WhatsApp (advanced setup)
This page covers the manual way to connect WhatsApp — you create your own Meta app, register the phone number yourself, and paste the credentials into the channel form. It is the Advanced mode of the WhatsApp connector.
Most people don't need this. The simple way is to sign in with Meta, which collects the same credentials for you. Use this page only when:
- The Login with Meta button is disabled with the message "Meta App ID and App Secret are not configured on the server" — your deployment has no shared Meta app, so you must bring your own.
- You already run your own Meta app and want to connect its WhatsApp number directly.
Templates, the 24-hour messaging window, and delivery statuses work the same however you connect — see the main WhatsApp page for those.
Before you start
- A Meta Business Account — create one at business.facebook.com if you don't have one yet.
- A phone number for the channel. Its SIM card must not be registered with any existing WhatsApp account and must be able to receive SMS verification codes.
- An account in the portal with permission to edit settings.
Get your Meta credentials
Set up the WhatsApp Business API in the Meta developer console and collect the values you will paste into the portal. Meta's console changes over time; for current details, see Meta's WhatsApp Business API documentation.
-
Create a developer app. Go to developers.facebook.com/apps and click Create App. Select the use case Other, the app type Business, and your business account.
-
Add WhatsApp to the app. In the App Dashboard, find the WhatsApp card, click Set Up, then Quickstart > Start using API.
-
Generate an access token. Under API Setup, click Generate Access Token and save the token.
-
Register your phone number. Under WhatsApp > API Setup, click Add phone number, enter the number, and verify it with the SMS code. Then confirm the registration with a Graph API call:
curl 'https://graph.facebook.com/v21.0/<PHONE_ID>/register' \
  -H 'Content-Type: application/json' \
  -H 'Authorization: Bearer <TOKEN>' \
-d '{ "messaging_product": "whatsapp", "pin": "<PIN>" }'<PHONE_ID>and<TOKEN>come from WhatsApp > API Setup;<PIN>is the SMS verification code. Make sure every value matches the Meta console exactly — a mismatch makes registration fail.
When the Meta side is ready, collect five values for the portal form:
| Value | Where to find it in the Meta console |
|---|---|
| App ID, App secret | App Settings > Basic |
| Access token, Phone number ID, Business account ID | WhatsApp > API Setup |
Create the connection
- Go to Settings > Channels, select WhatsApp in the list, and click Add. The New connector form opens on the right.
- Turn the Advanced mode switch on. The credential fields appear.
- Fill in the form — see the field table below. Enter every value you collected in the Meta console, including the fields the form does not mark as required.
- Click Save.
- Click Start in the panel header. The status dot turns purple (STARTING), then green (RUNNING).
| Field | Required | Description |
|---|---|---|
| Name | Yes | Internal name shown across the portal. |
| Description | No | Internal reference. |
| App ID | No | The ID of your Meta app. |
| App secret | No | The app secret, found next to the App ID. |
| Access token | Yes | The WhatsApp API access token you generated. |
| Phone number ID | No | One or more phone number IDs. See Use multiple phone numbers. |
| Business account ID | Yes | Your WhatsApp business account ID. |
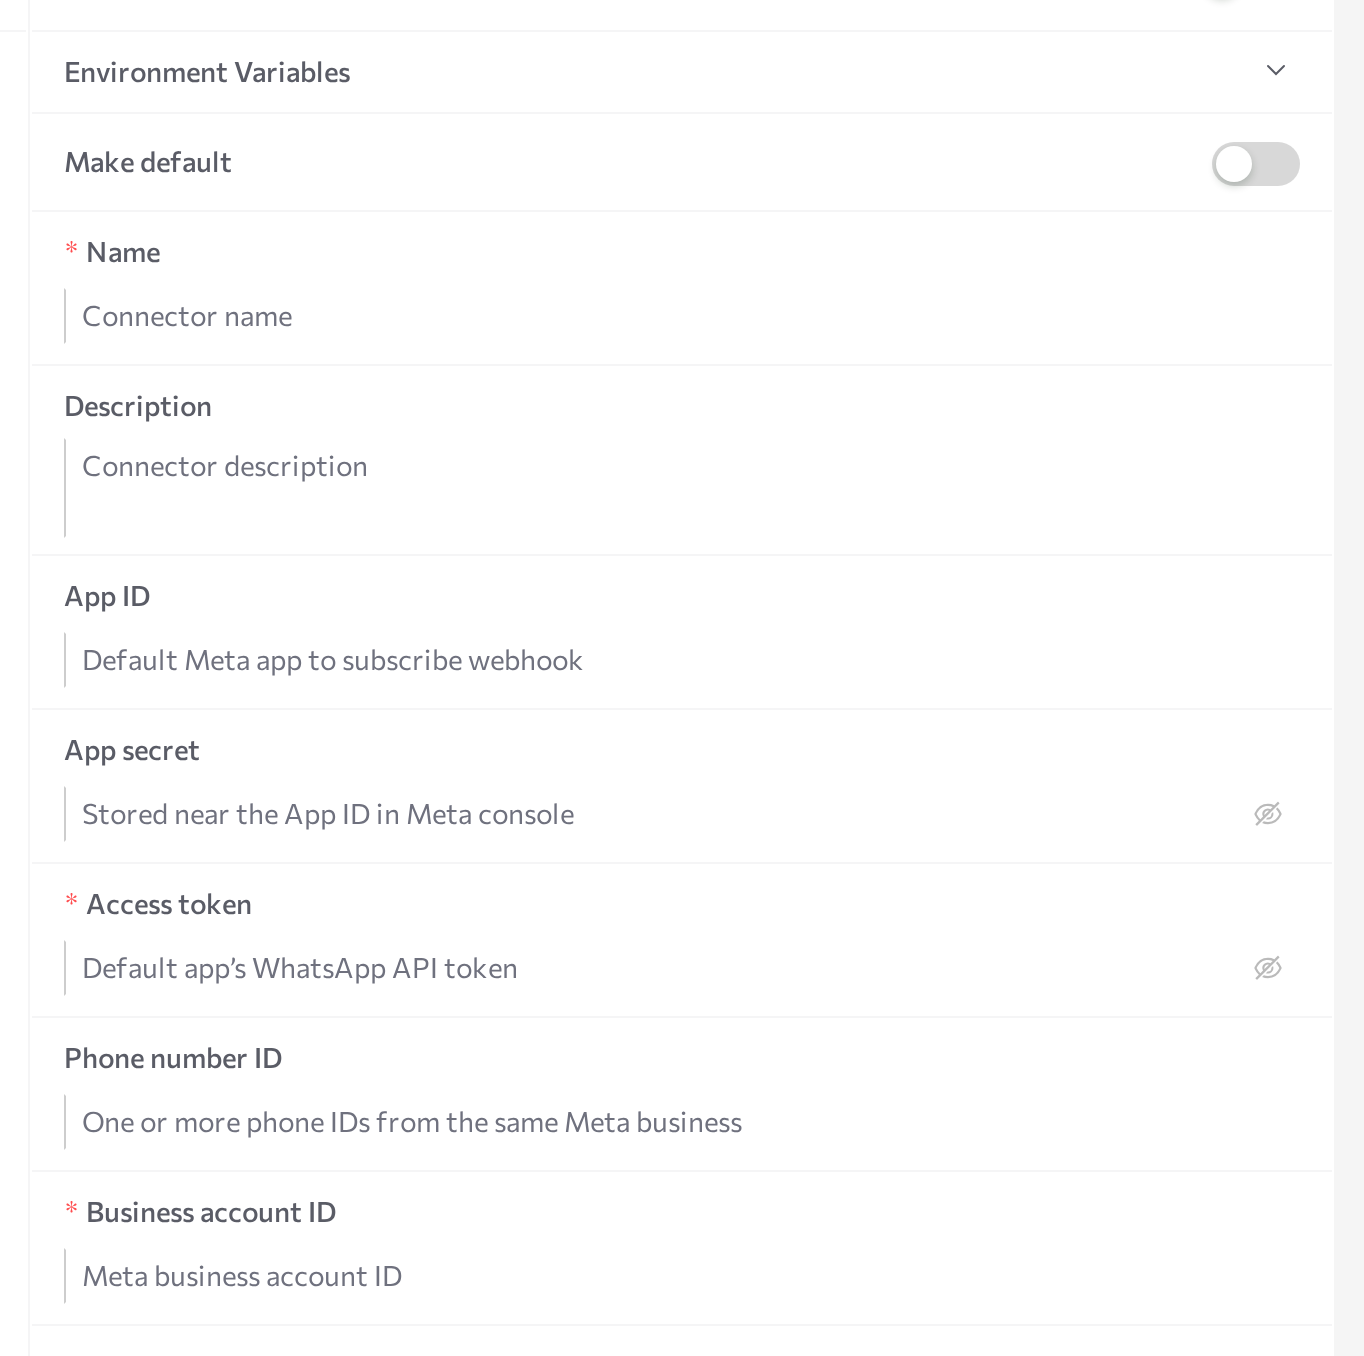
For the general mechanics of the screen — status dots, Logs, editing credentials, stopping and restarting — see the Channels overview.
Replace an expired access token
If the access token is rotated or stops working, update the connection rather than creating a new one:
- Go to Settings > Channels and select the WhatsApp connection. Secret fields display masked.
- Paste the new token into Access token and click Save.
- Restart the channel: click Stop, wait for STOPPED, then click Start.
Use multiple phone numbers
One WhatsApp connection can serve several phone numbers from the same Meta business account. Enter the Phone number ID values separated by commas — for example, 487008484500533, 487215647816419 — and keep the order consistent across related fields.
Outbound messages rotate through the numbers. After the first message, each recipient keeps the same sender number, so every customer sees one continuous conversation.
Common issues
- The channel goes to ERROR right after Start. Credentials are wrong or expired. Open the connection, click Logs, re-check the Access token and Business account ID, Save, and start again.
- Registration fails. The
registercall rejects the number when a value in the curl command does not match the Meta console, or the number is already registered with another WhatsApp account. Re-check<PHONE_ID>,<TOKEN>, and<PIN>. - Messages stop being delivered. Access tokens expire and numbers can be disconnected. Check that the token is still valid and that the number shows Connected in the Meta console, then check the channel Logs.
Related pages
- WhatsApp — connect by signing in with Meta, plus templates, the 24-hour window, and delivery statuses
- Channels overview — create, start, stop, and troubleshoot channel connections
- Sessions — read WhatsApp conversations and delivery statuses