Configure an Agent
Agents you create today open on this page — six tabs on the left, a collapsible Playground panel on the right, and a header that shows whether the agent is running and whether it has changes to apply.
Agents created before this page existed keep opening in Simple mode or Advanced mode instead. The header shows a Legacy badge for these — see Move a legacy agent to the current page.
Find your way around
| Tab | What you configure |
|---|---|
| General | The agent's profile, persona, tone, task, and welcome message. |
| Knowledge | The content the agent answers from — the same Knowledge Sources as the rest of the portal. |
| Capabilities | Tools, skills, and built-in capabilities the agent can use — see Capabilities. |
| Channels | Which of your tenant's channels this agent uses. |
| Workflow | A visual editor for the agent's conversation flow. |
| Settings | AI models, environment variables, session limits, analytics, and other advanced configuration. |
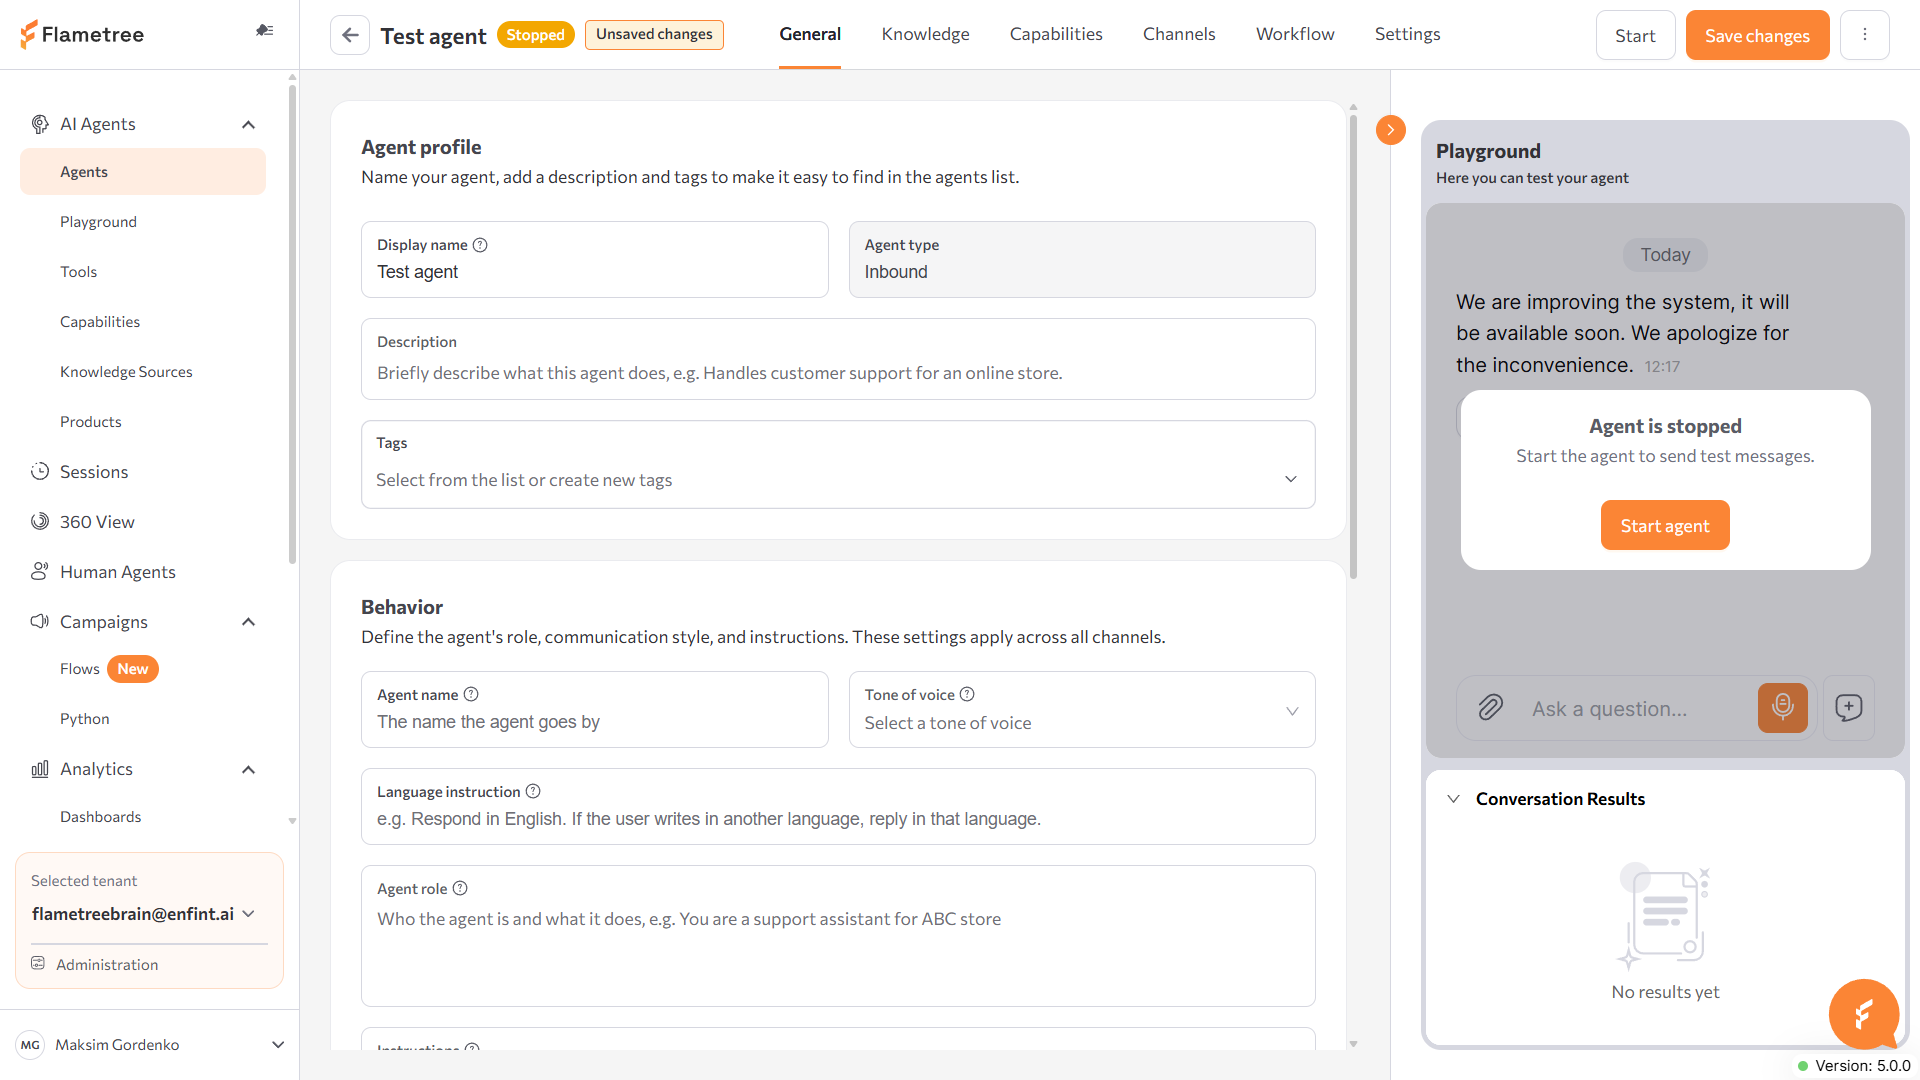
Open the Playground panel from any tab except Workflow to test your changes as you go — see Playground.
General tab
Agent profile
- Display name — the agent's name in the agents list and in this page's header.
- Agent type — read-only; set when you created the agent.
- Description and Tags — for your own organization.
Behavior
- Agent name — the agent's own name, separate from the display name above. It goes into the prompt, and the agent introduces itself with it.
- Agent role — who the agent is and what it represents.
- Tone of voice — pick a preset; picking one replaces the current speech-style text.
- Language instruction — for example, "Respond in English. If the user writes in another language, reply in that language."
- Instructions — the agent's task: what it must accomplish in every conversation.
- Welcome message — a toggle that opens a dialog for the first message customers see. The portal sends it exactly as written at the start of the conversation — the model doesn't rephrase it.
- Use contact data — whether the agent receives the contact's known details at the start of a conversation.
Conversation Results
Define the data the agent captures from each conversation, the same way as Conversation Results in Simple mode.
Knowledge tab
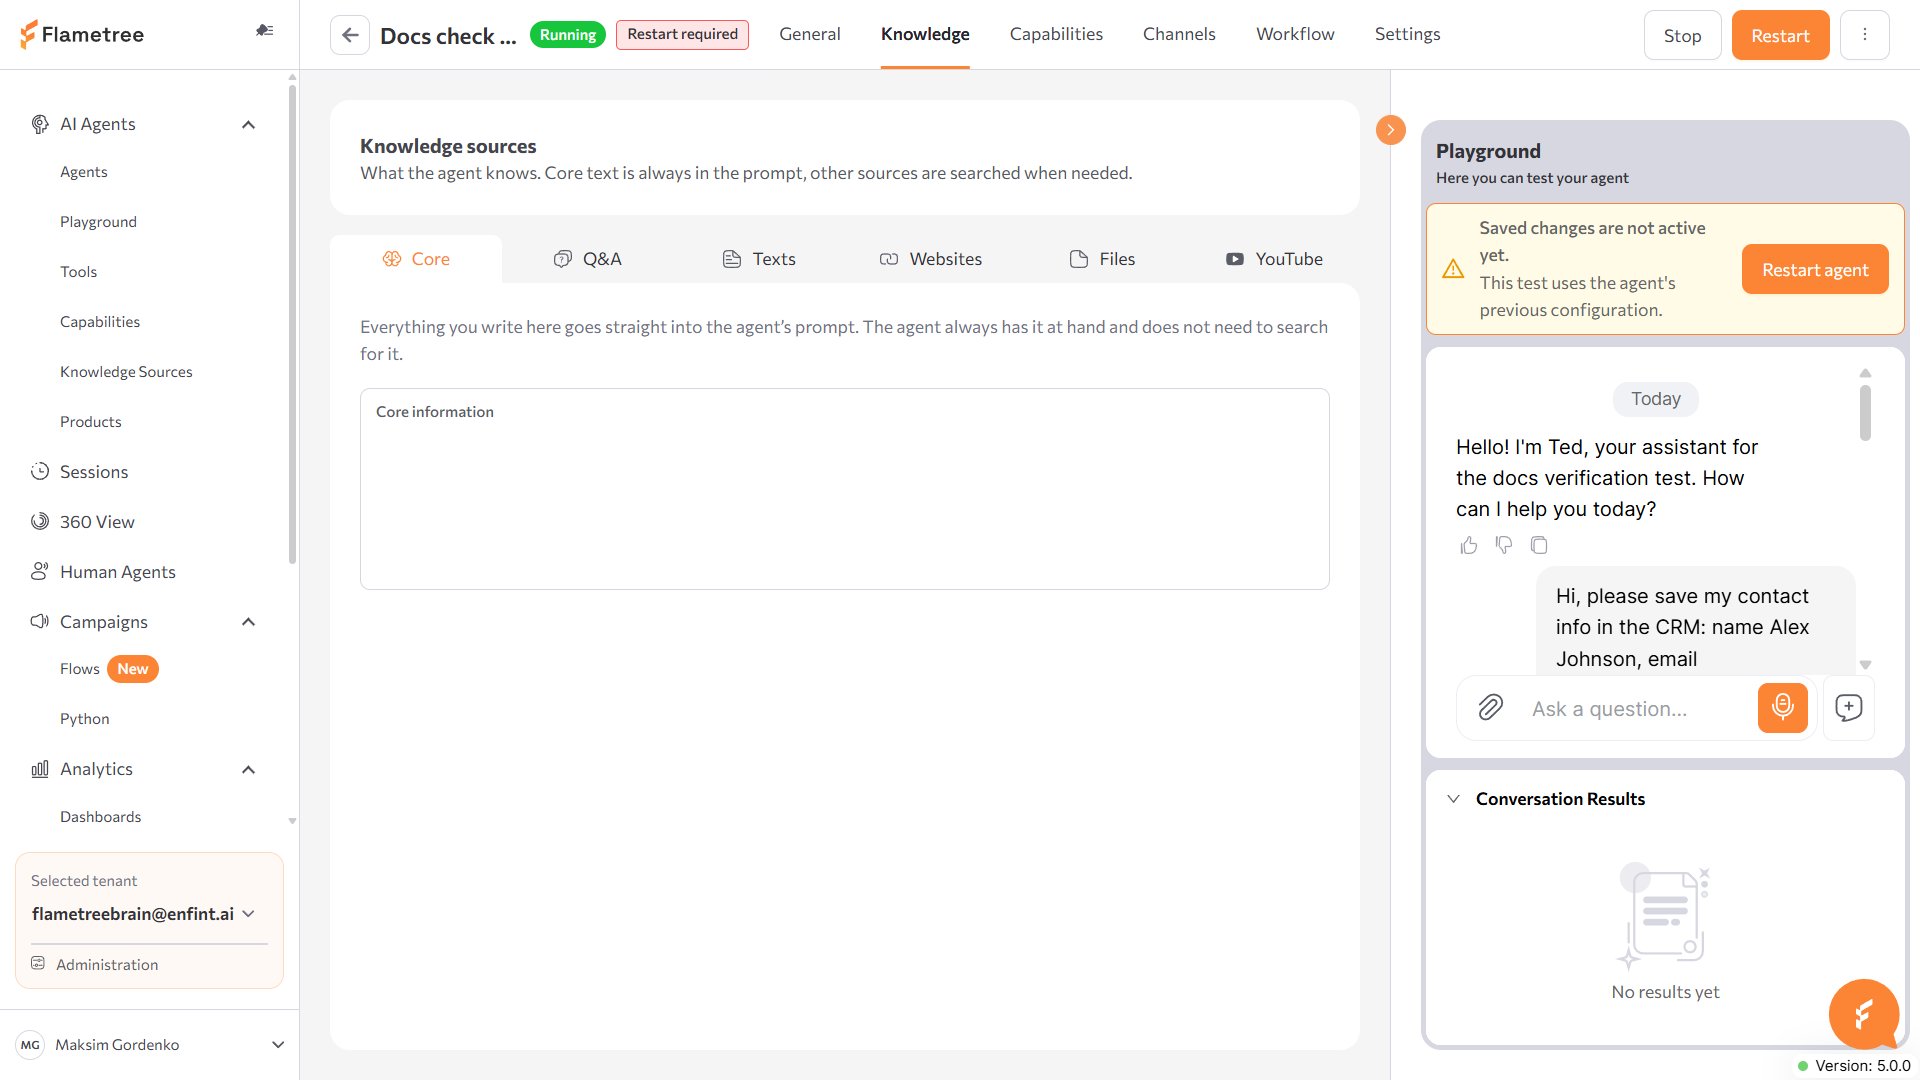
The same underlying Knowledge Sources as elsewhere in the portal, on six sub-tabs: Core, Q&A, Texts, Websites, Files, and YouTube.
Capabilities tab
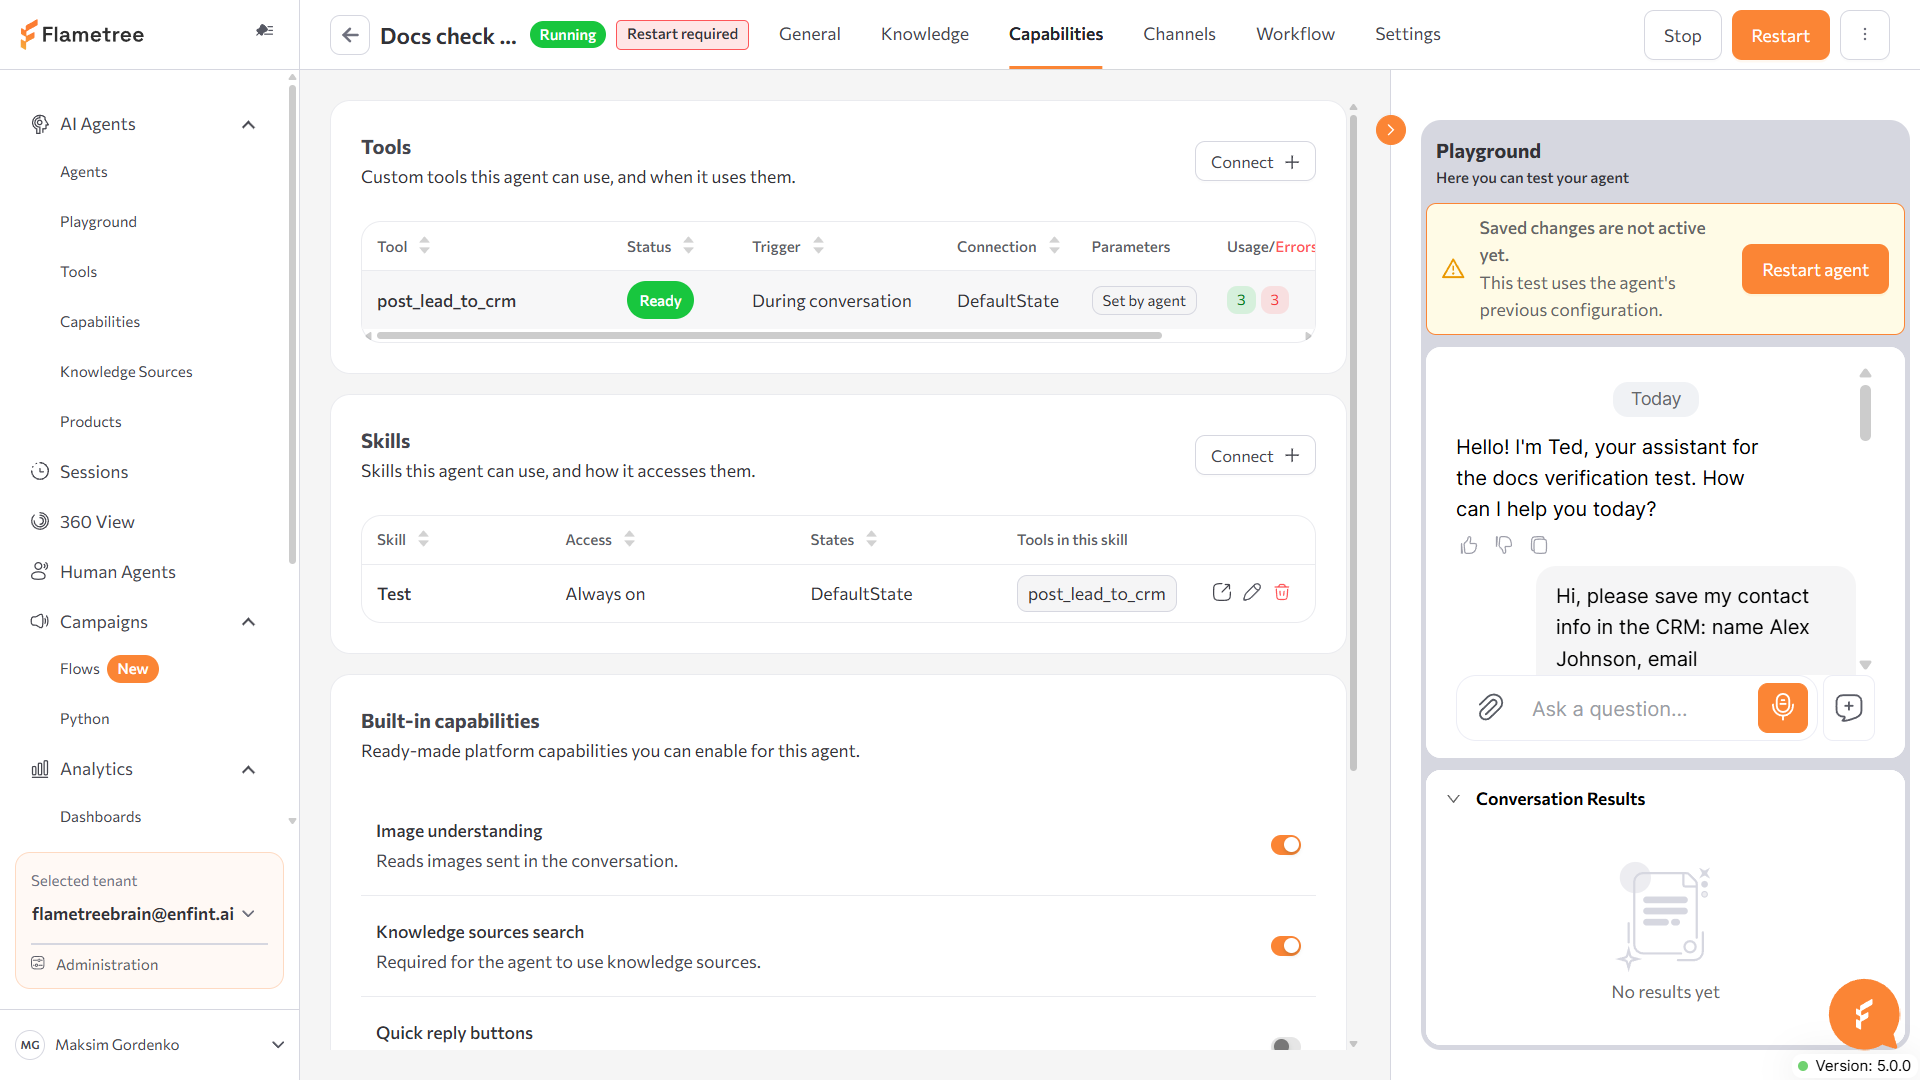
Attach the tools and skills built in Capabilities, and see which of the platform's built-in capabilities this agent uses:
- Tools — the agent's connected tools, with Connect. Columns: Tool, Status, Trigger, Connection, Parameters, Runs / Errors.
- Skills — the agent's connected skills, with Connect. Columns: Skill, Access, States, Tools in this skill.
- Built-in capabilities — a toggle per platform capability (for example Image understanding, Knowledge sources search), on or off for this agent.
See Capabilities for how tools and skills are built and what each trigger and access mode means.
Channels tab
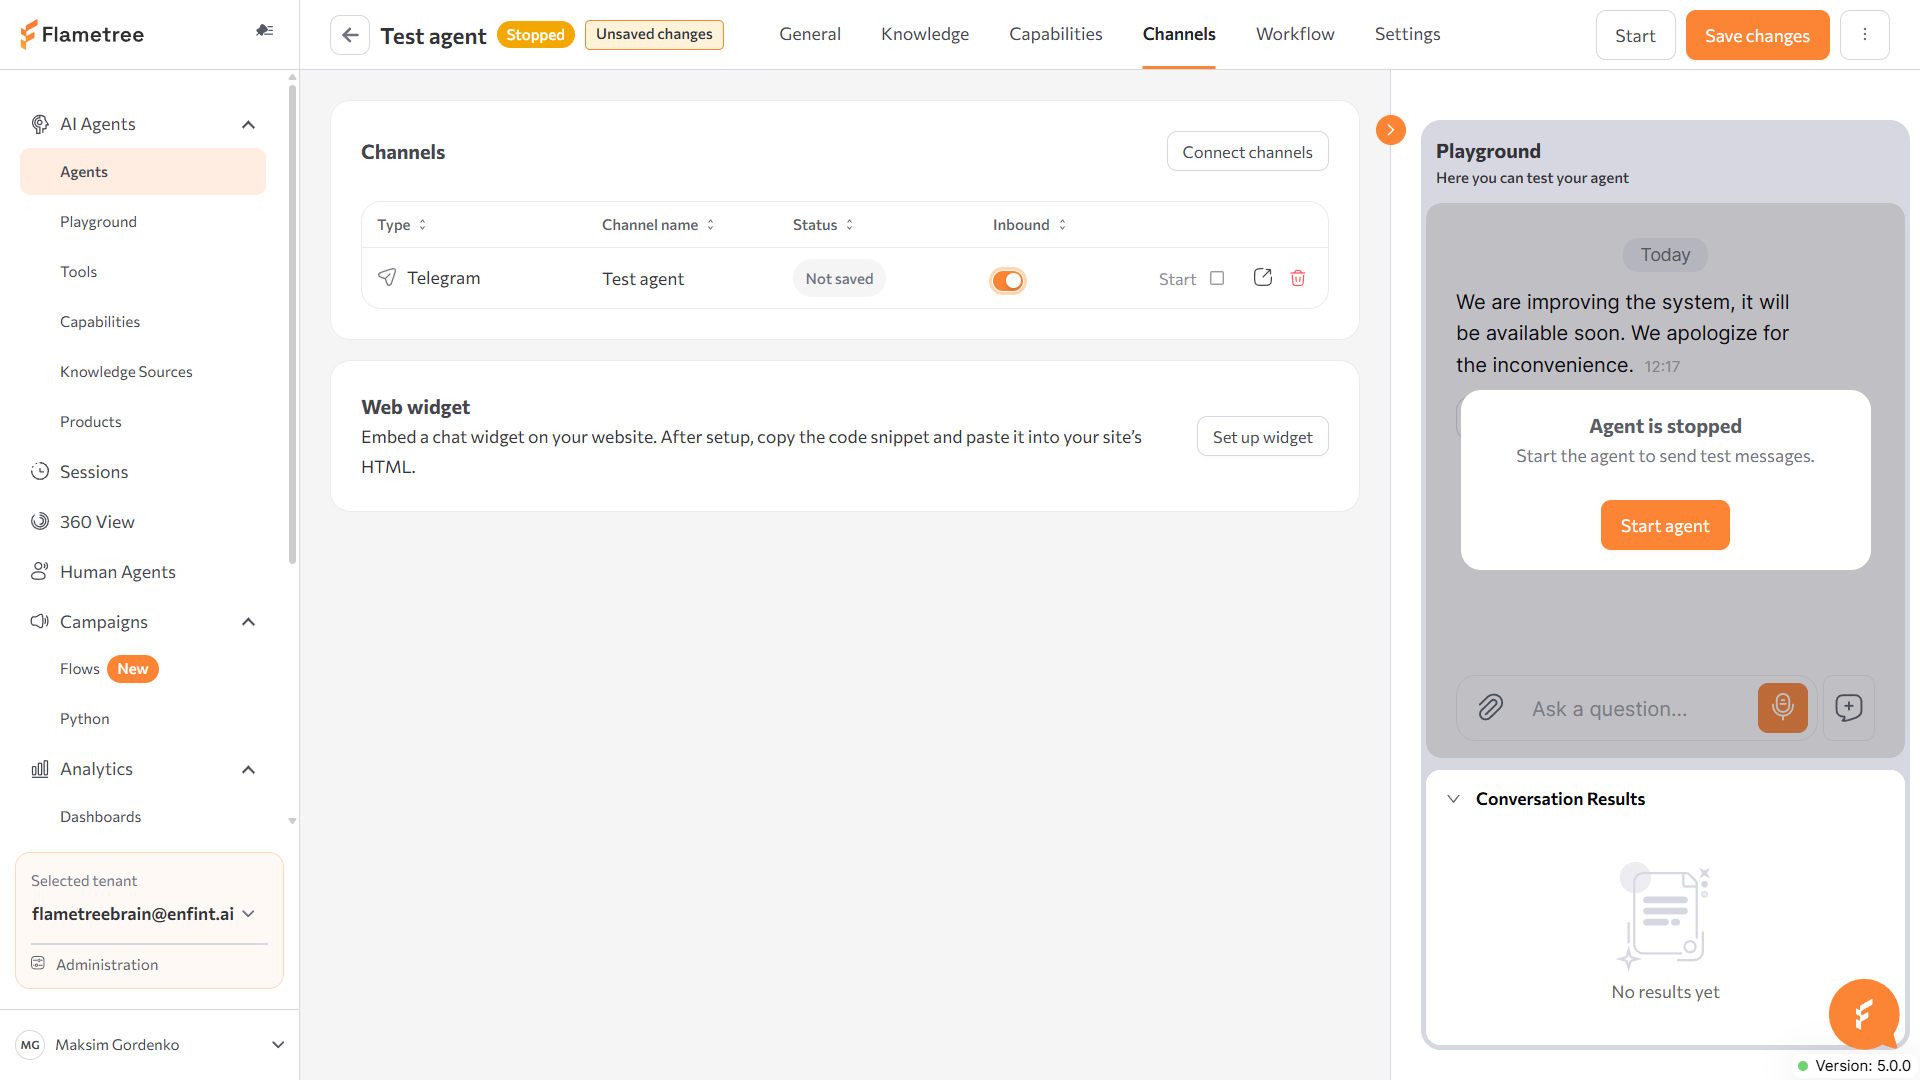
Channels
Click Connect channels to attach channels your tenant has already set up. Each row shows the channel's Type, Channel name, and Status, with an Inbound toggle, a start action, and icon buttons to open it in Communication channels or disconnect it.
This tab attaches and detaches existing channels — it doesn't create new ones. To set up a channel that doesn't exist yet, click Connect channels, then Create new channel in that dialog; it opens Settings > Channels in a new tab.
Web widget
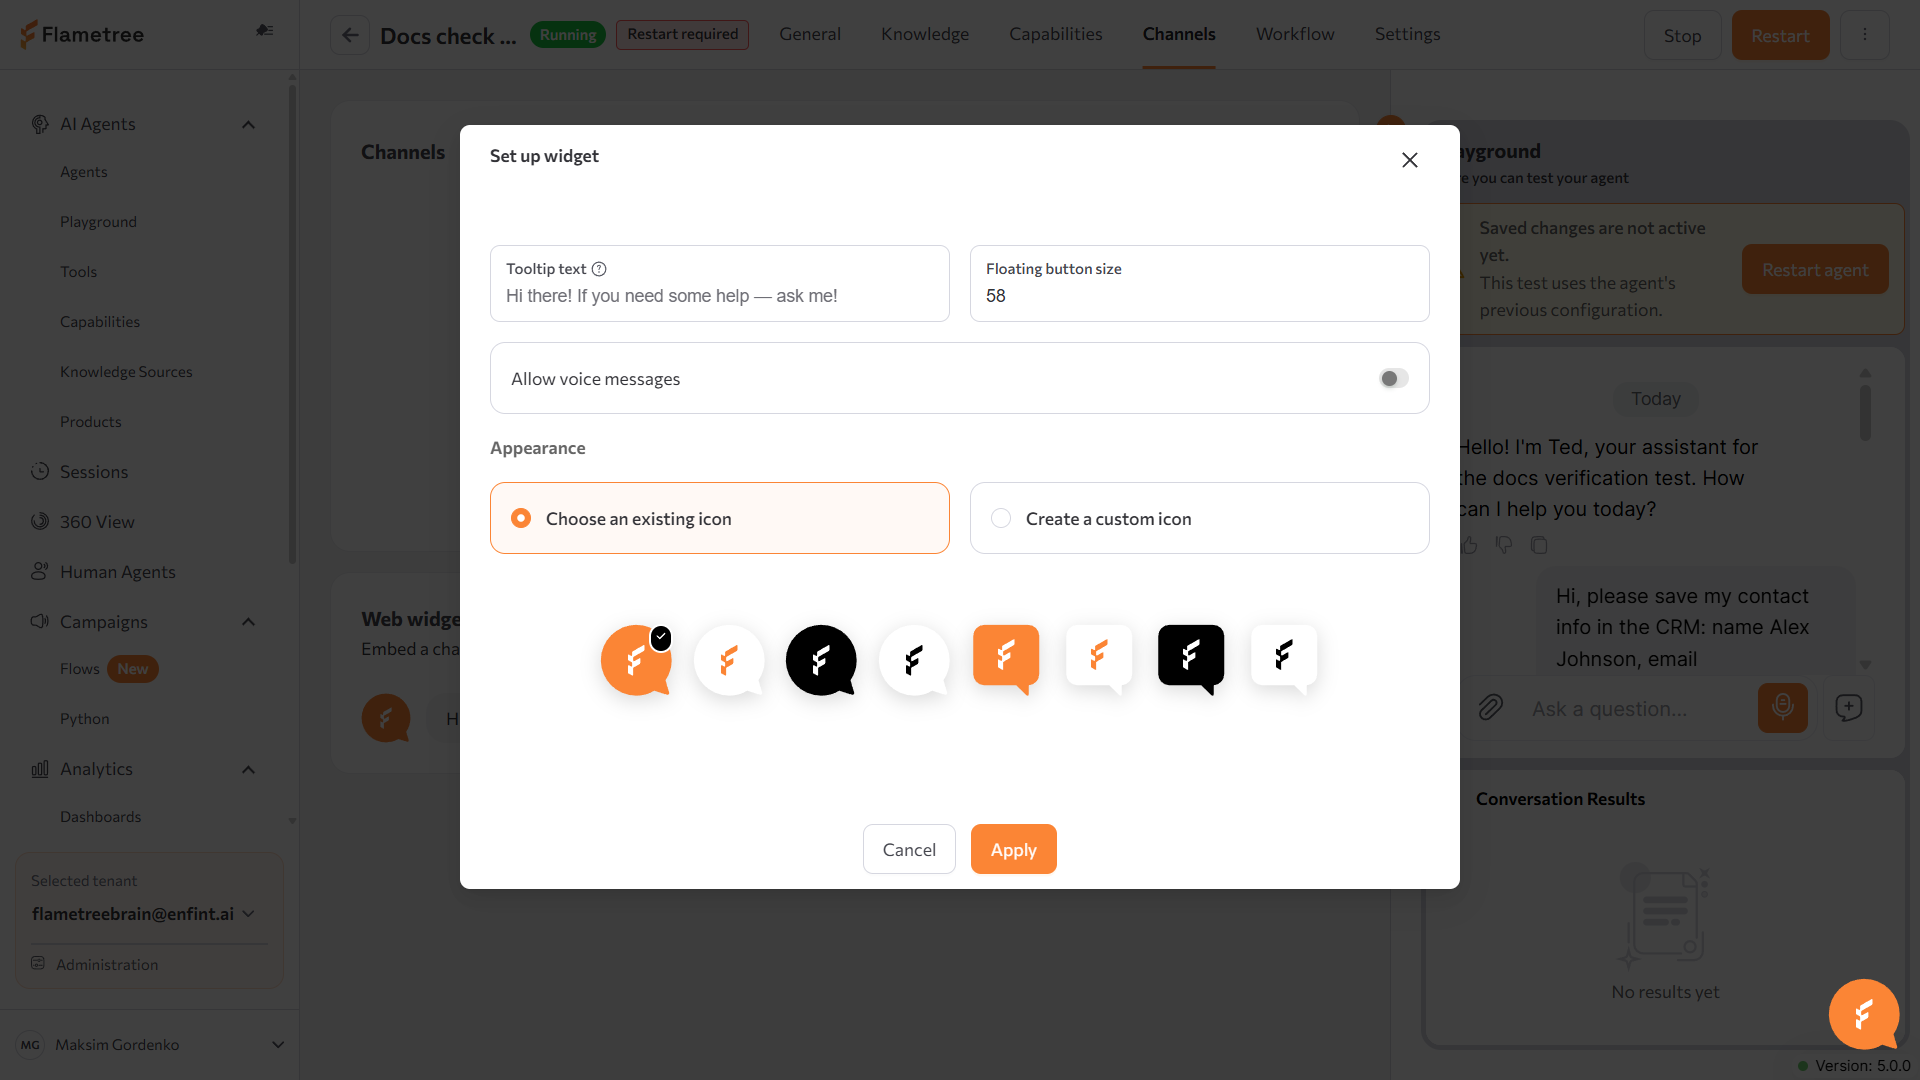
Click Set up widget to configure the embeddable chat widget for this agent:
| Field | Description |
|---|---|
| Tooltip text | Shown next to the widget button before the visitor opens the chat. |
| Floating button size | 40–150 pixels. |
| Allow voice messages | Lets visitors send voice messages in the widget. |
| Appearance | Choose an existing icon from a preset grid, or create a custom icon with your own Button color and Icon color. |
Once set up, the section shows a live preview of the bubble and: Copy HTML code (the snippet to paste into your site), Open demo page (try the widget on a hosted test page), and a delete action. Save the agent before Copy HTML code or Open demo page — both stay disabled on unsaved widget changes.
Workflow tab
A visual canvas for the agent's conversation flow, replacing the YAML workflow from Advanced mode for agents on this page. A workflow is made up of states (what the agent does at each step) and transitions (how the agent moves between them) — click a state or a transition on the canvas to edit it in the panel on the right.
Each state card shows its name, an optional one- or two-line summary of its instructions, and counts of the tools, skills, and built-in capabilities it uses. A green Start bar marks the workflow's starting state. The bottom-left toolbar has selection and pan tools, zoom in/out, and Re-center.
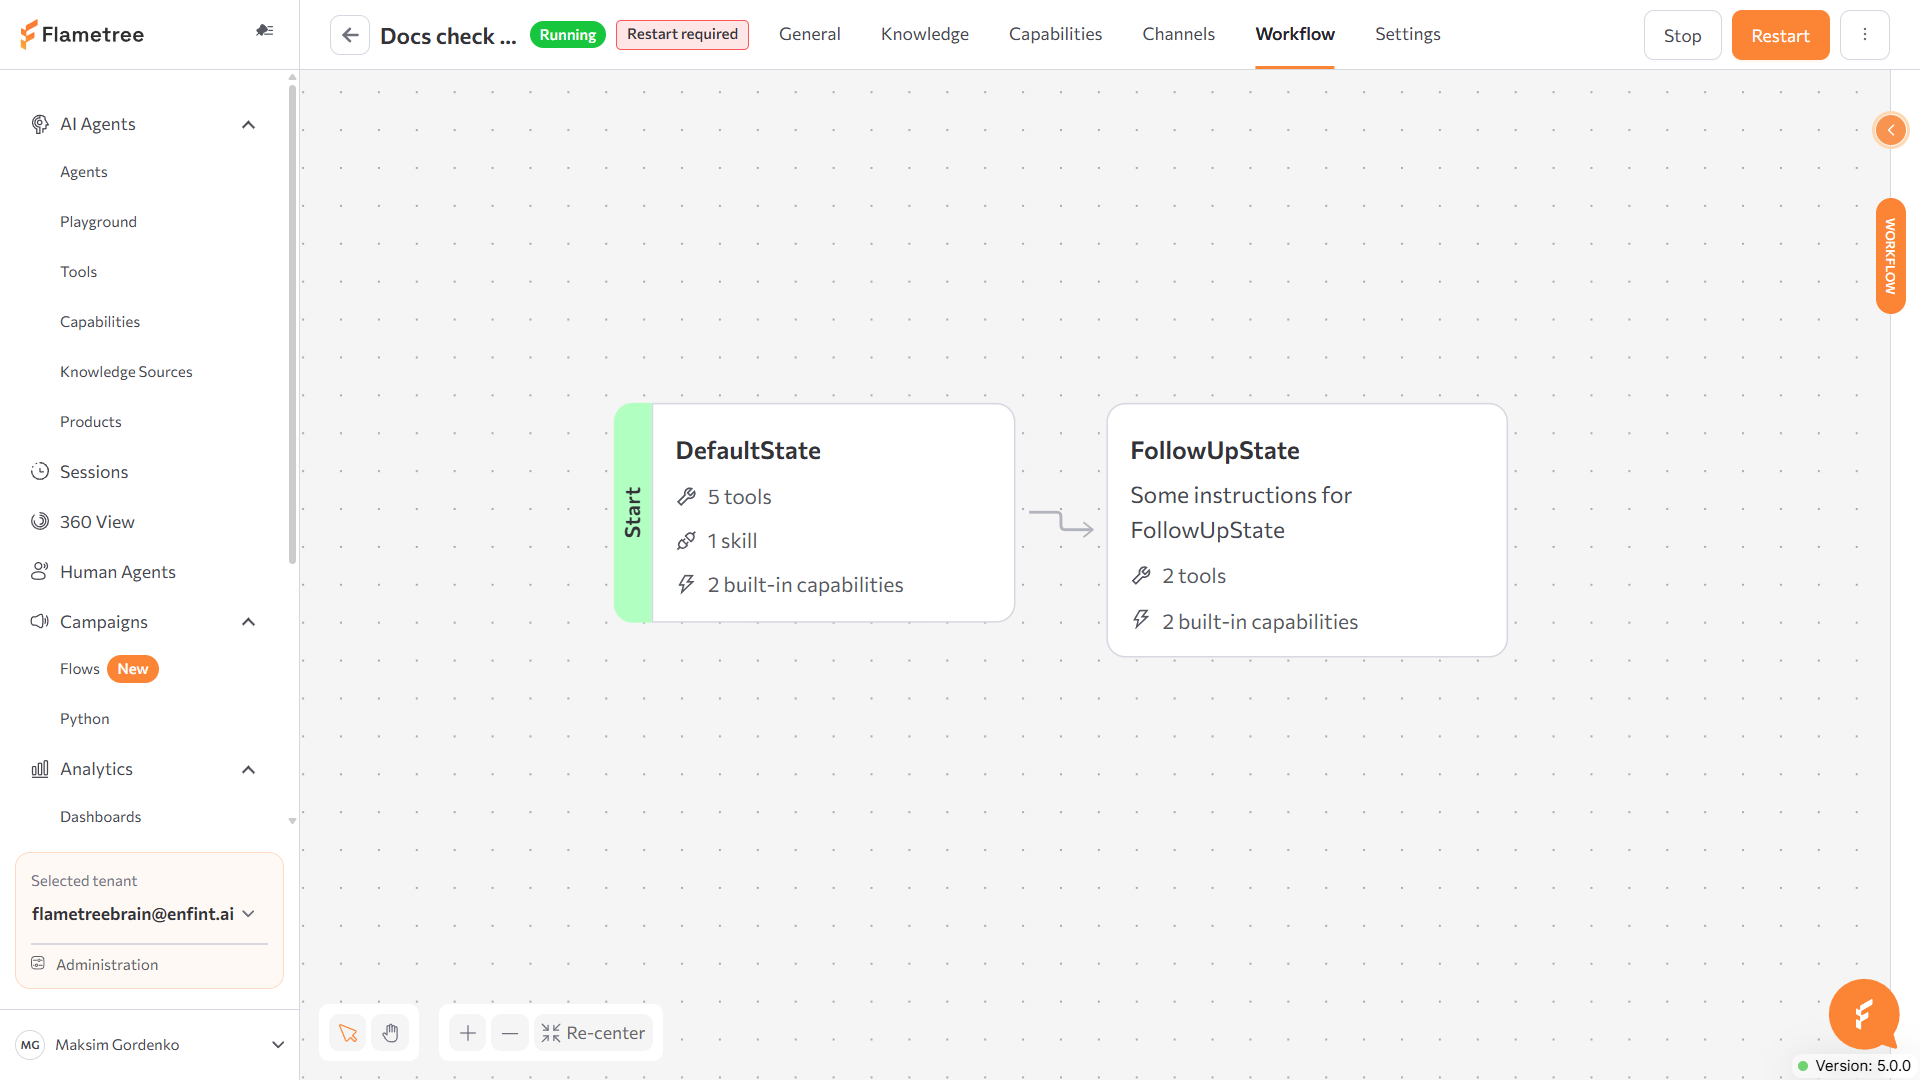
The panel on the right can be collapsed to a Workflow tab along its edge — click it, or the arrow above it, to bring the panel back.
Configure a state
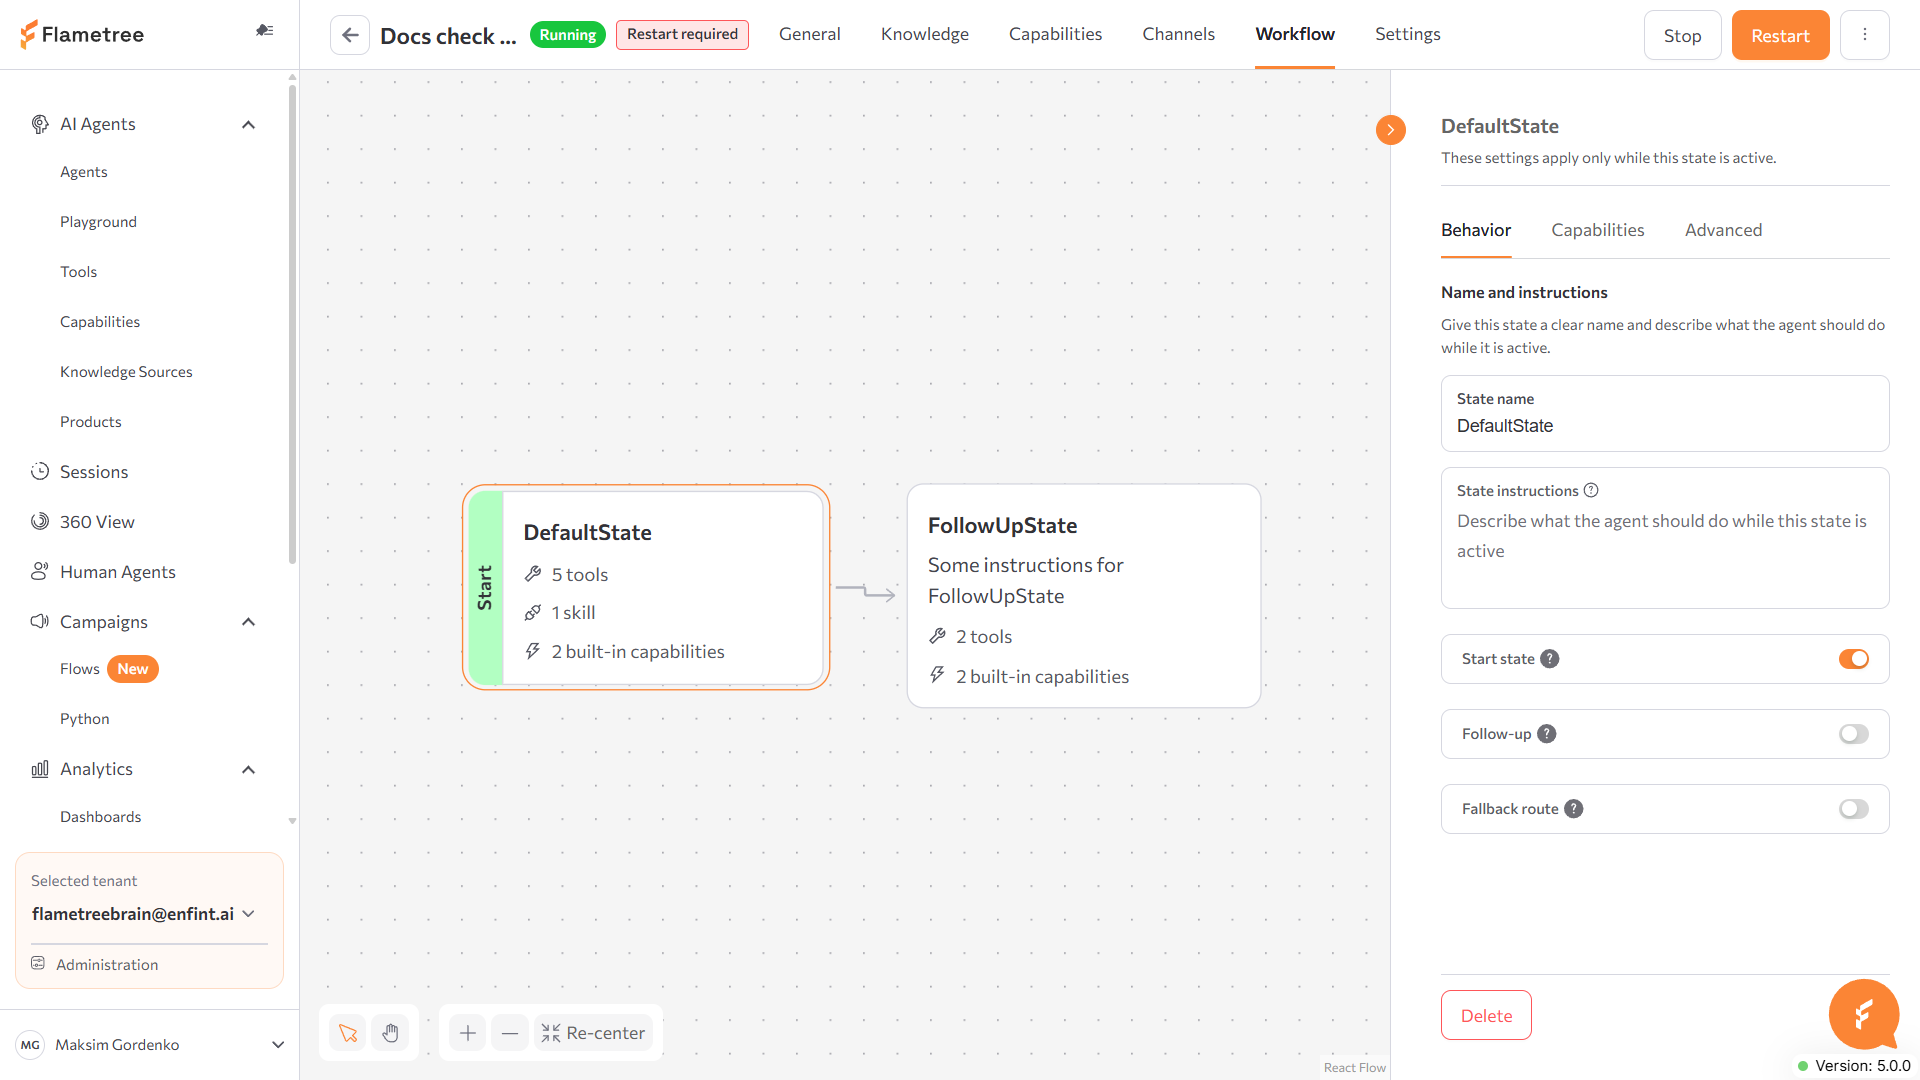
Click a state card to open its settings, on three tabs:
Behavior — under Name and instructions, the State name and State instructions (what the agent should do while this state is active). Below that, three toggles: Start state (marks this the workflow's starting state), Follow-up (see below), and Fallback route (what happens after too many failed attempts, configured when turned on).
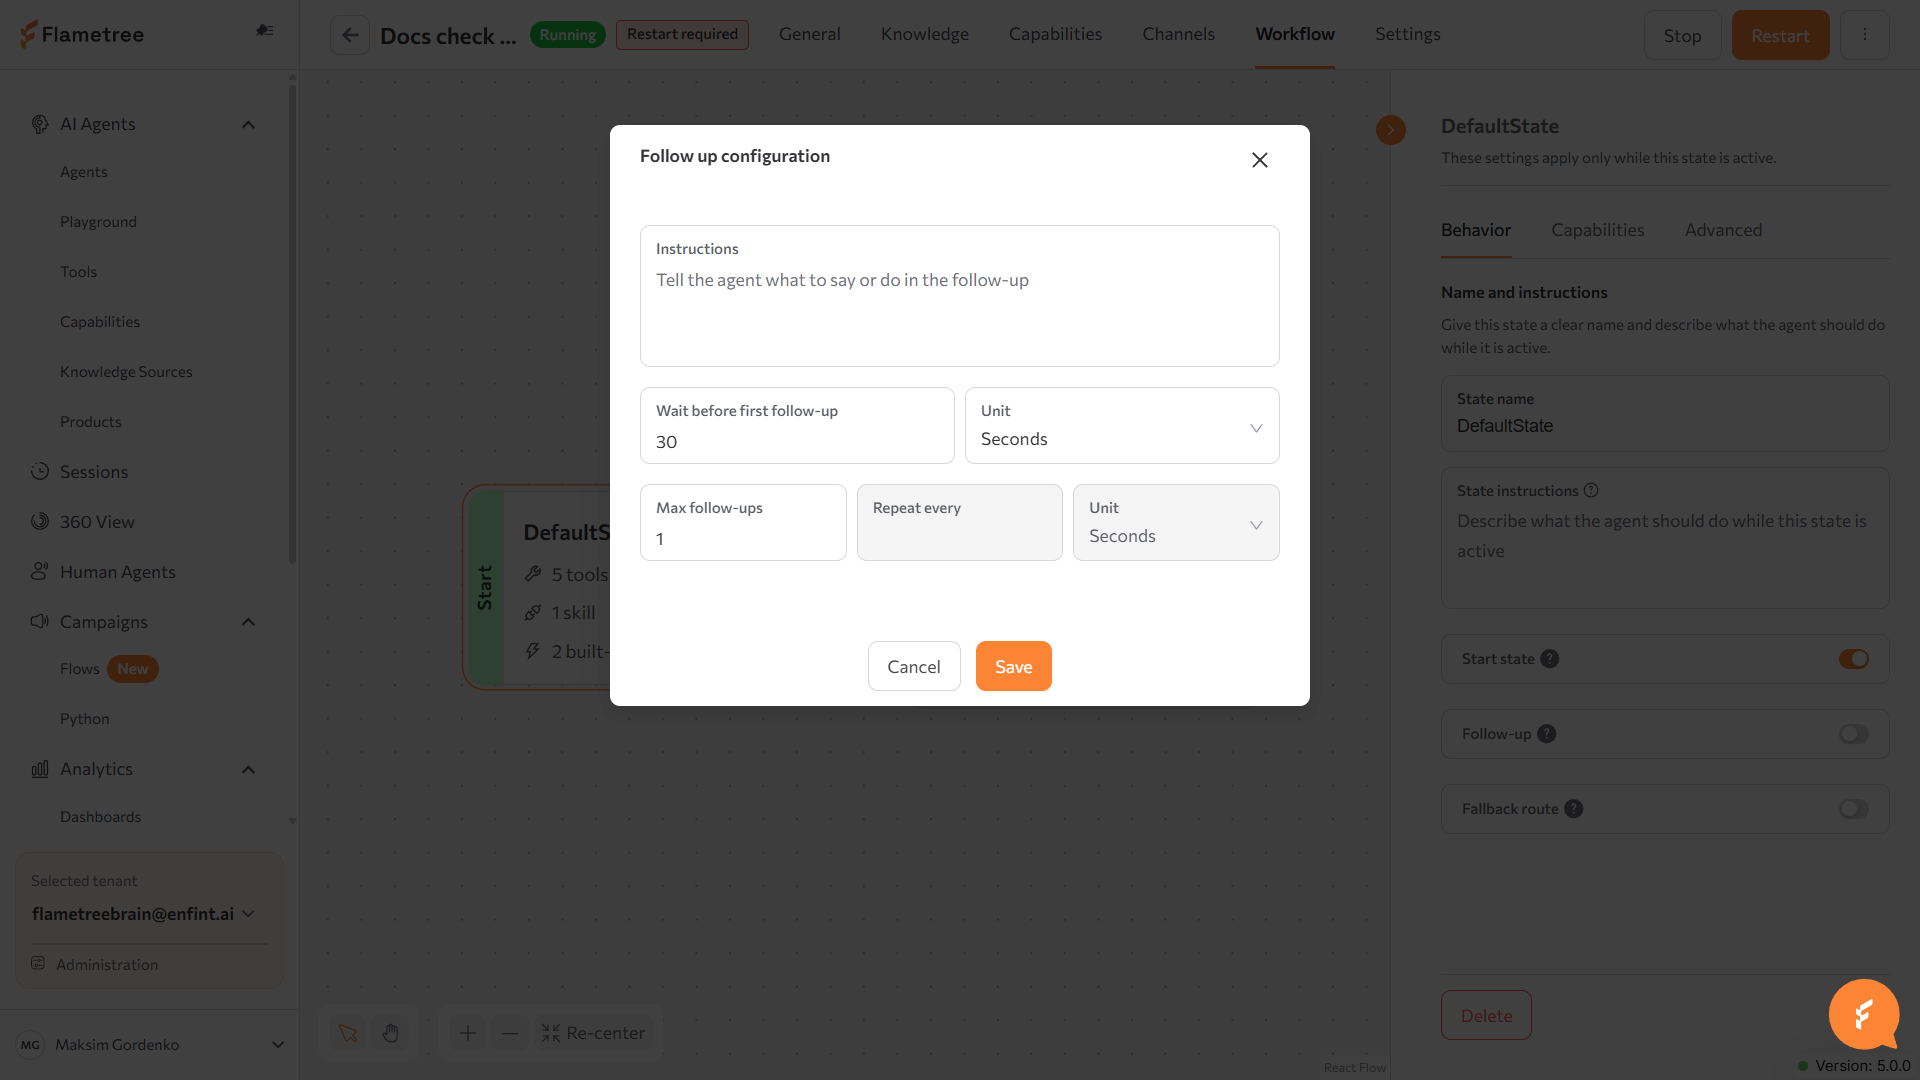
Turning on Follow-up adds a Configure button that opens a dialog for Instructions (what the agent should say or do), Wait before first follow-up and its time unit, and Max follow-ups with a Repeat every interval — Repeat every is disabled while Max follow-ups is 1.
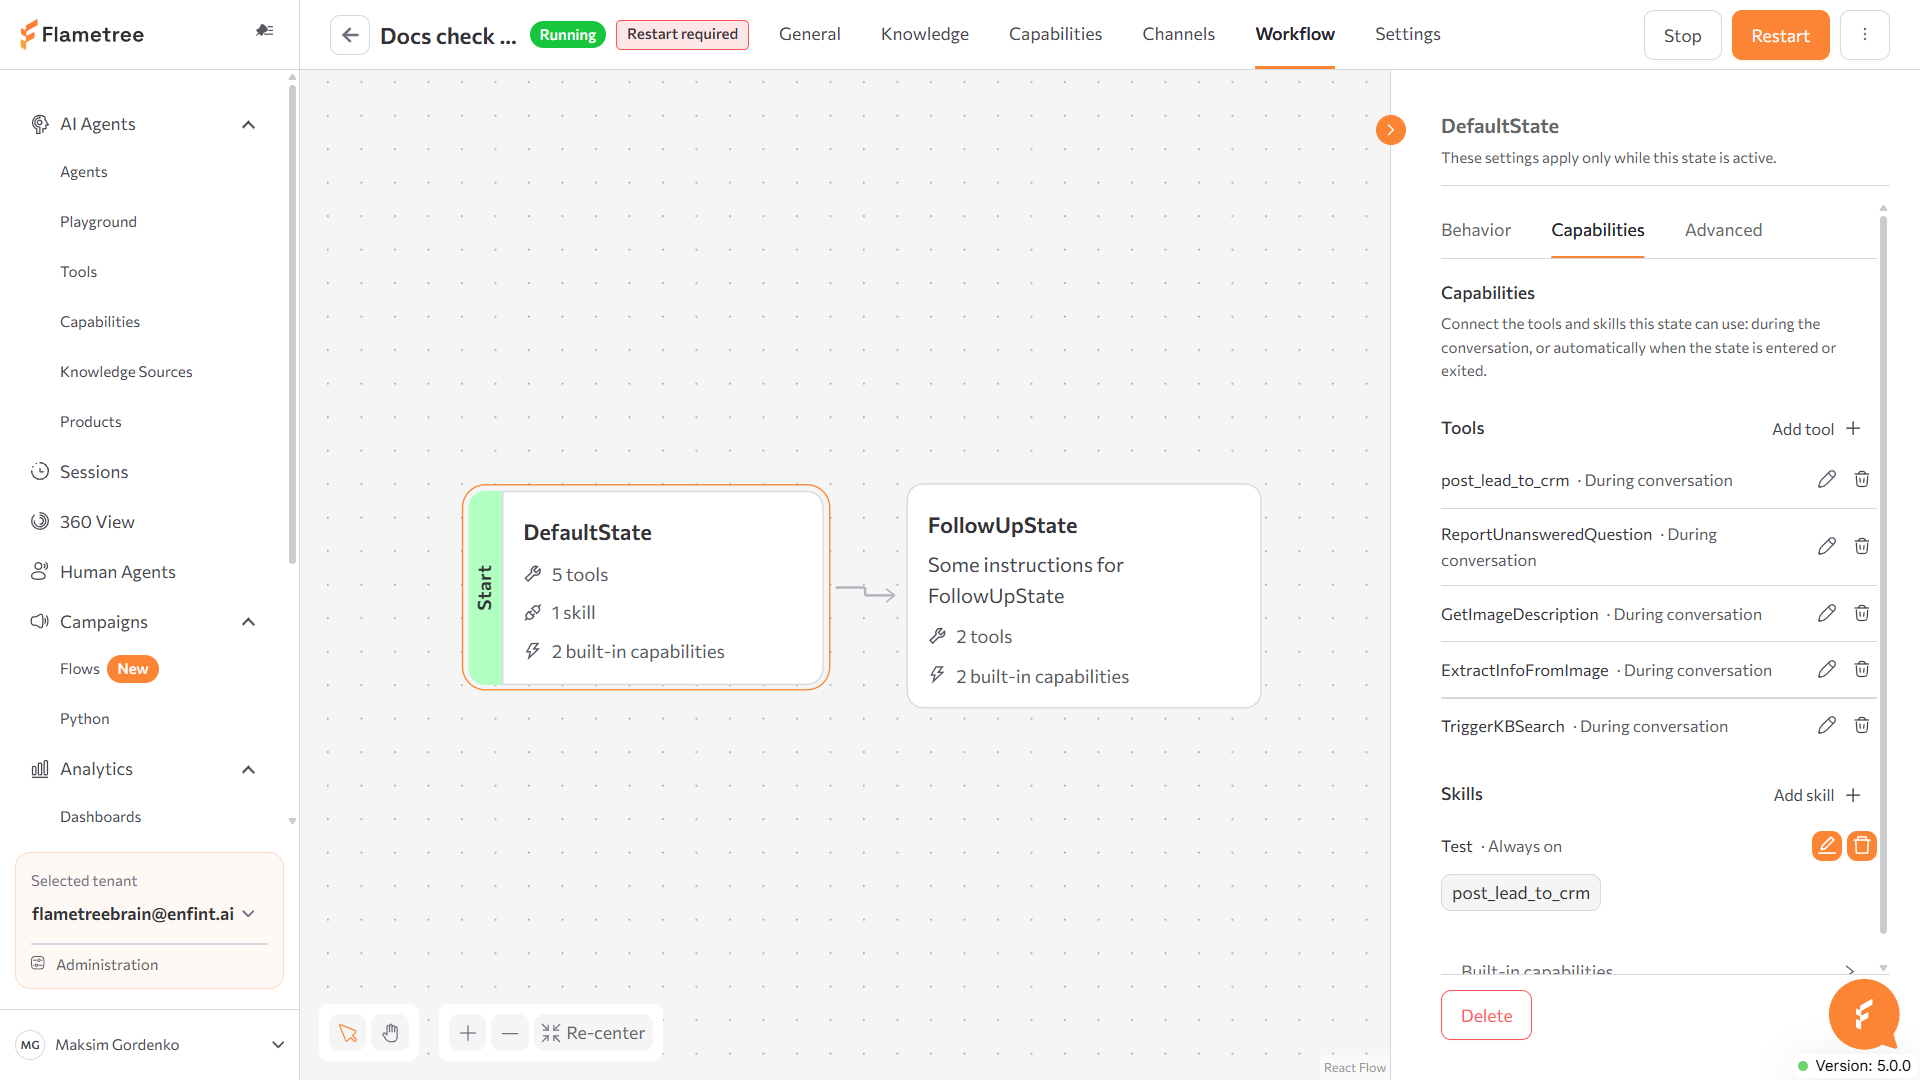
Capabilities — Tools and Skills the state can use, each with Add tool / Add skill; every connected tool or skill shows its trigger (for example During conversation) next to its name, with edit and delete icons. A collapsed Built-in capabilities section sits below.
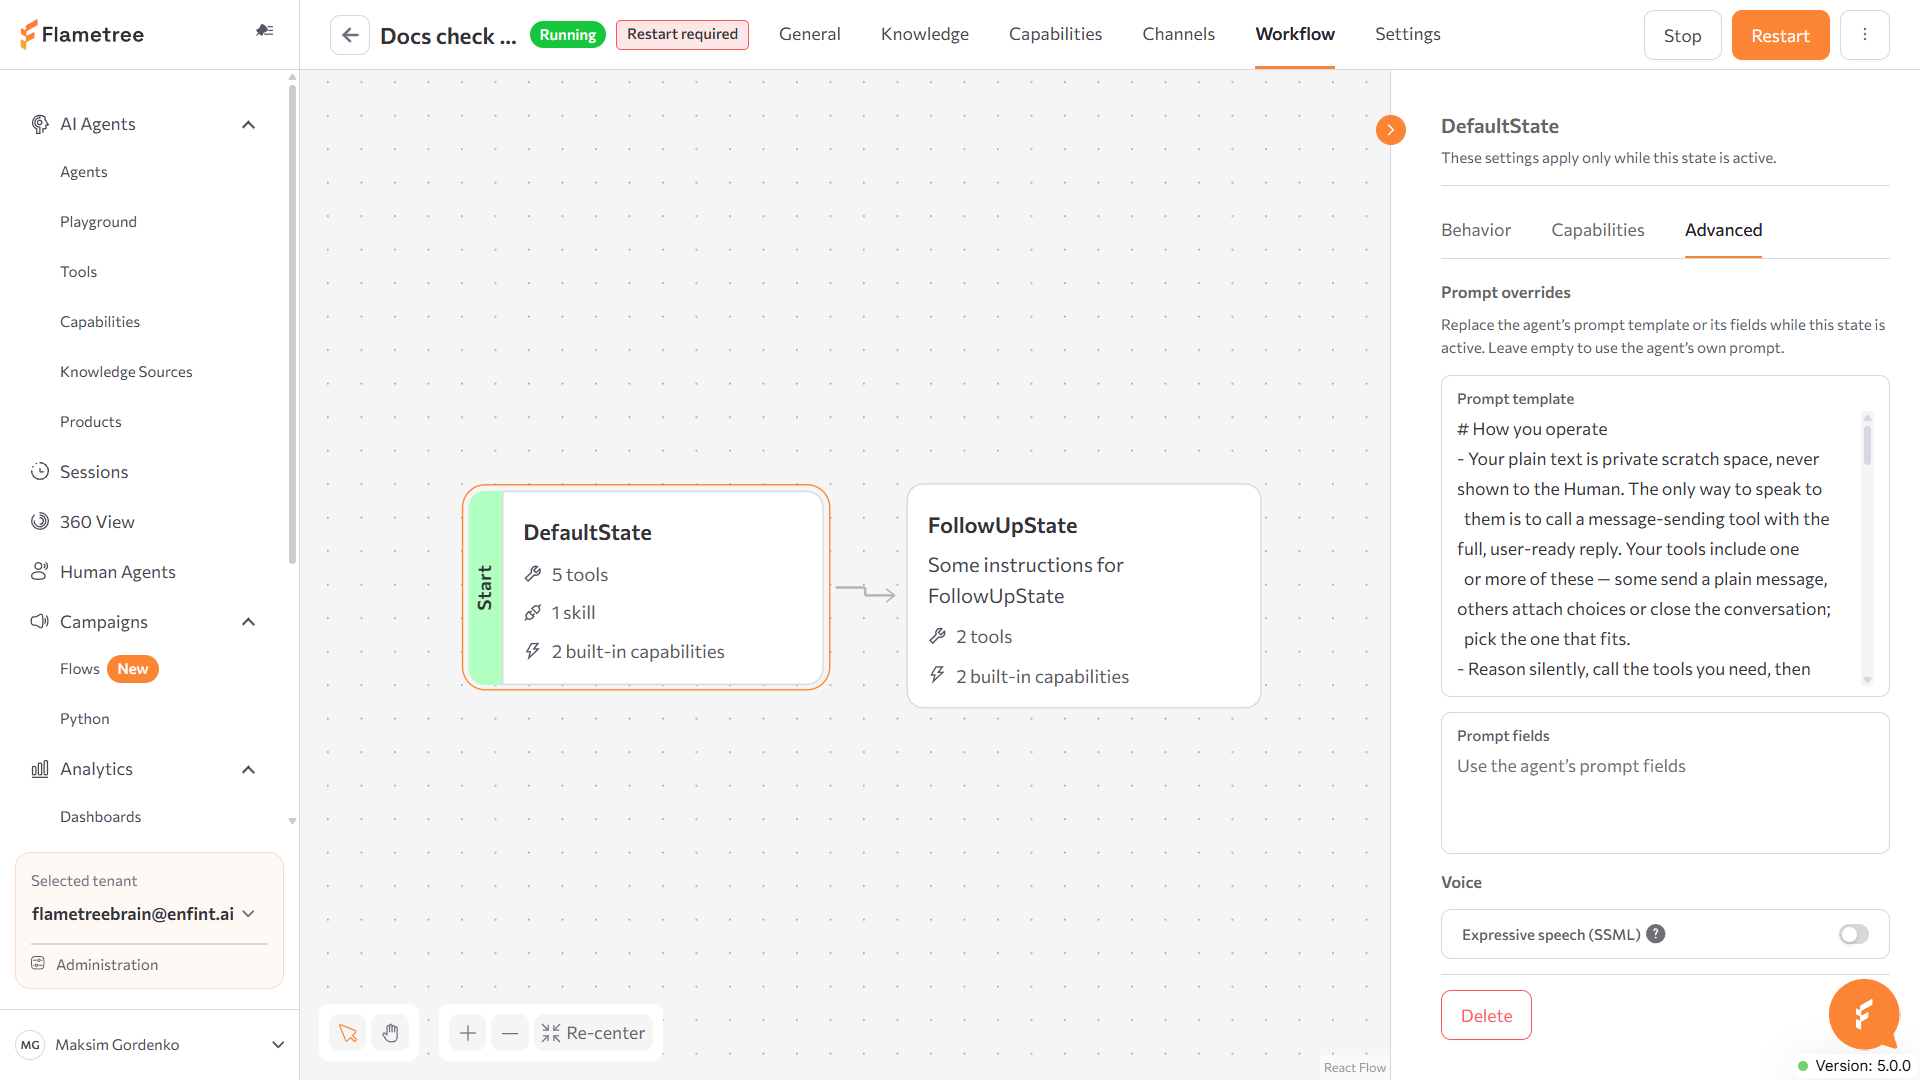
Advanced — under Prompt overrides, a Prompt template field and a Prompt fields field to replace the agent's own prompt or its fields while this state is active (leave empty to use the agent's prompt). Below that, a Voice section with an Expressive speech (SSML) toggle.
A Delete button at the bottom of the panel removes the state, along with its transitions and everything configured on it — connected tools, skills, and built-in capabilities.
Configure a transition
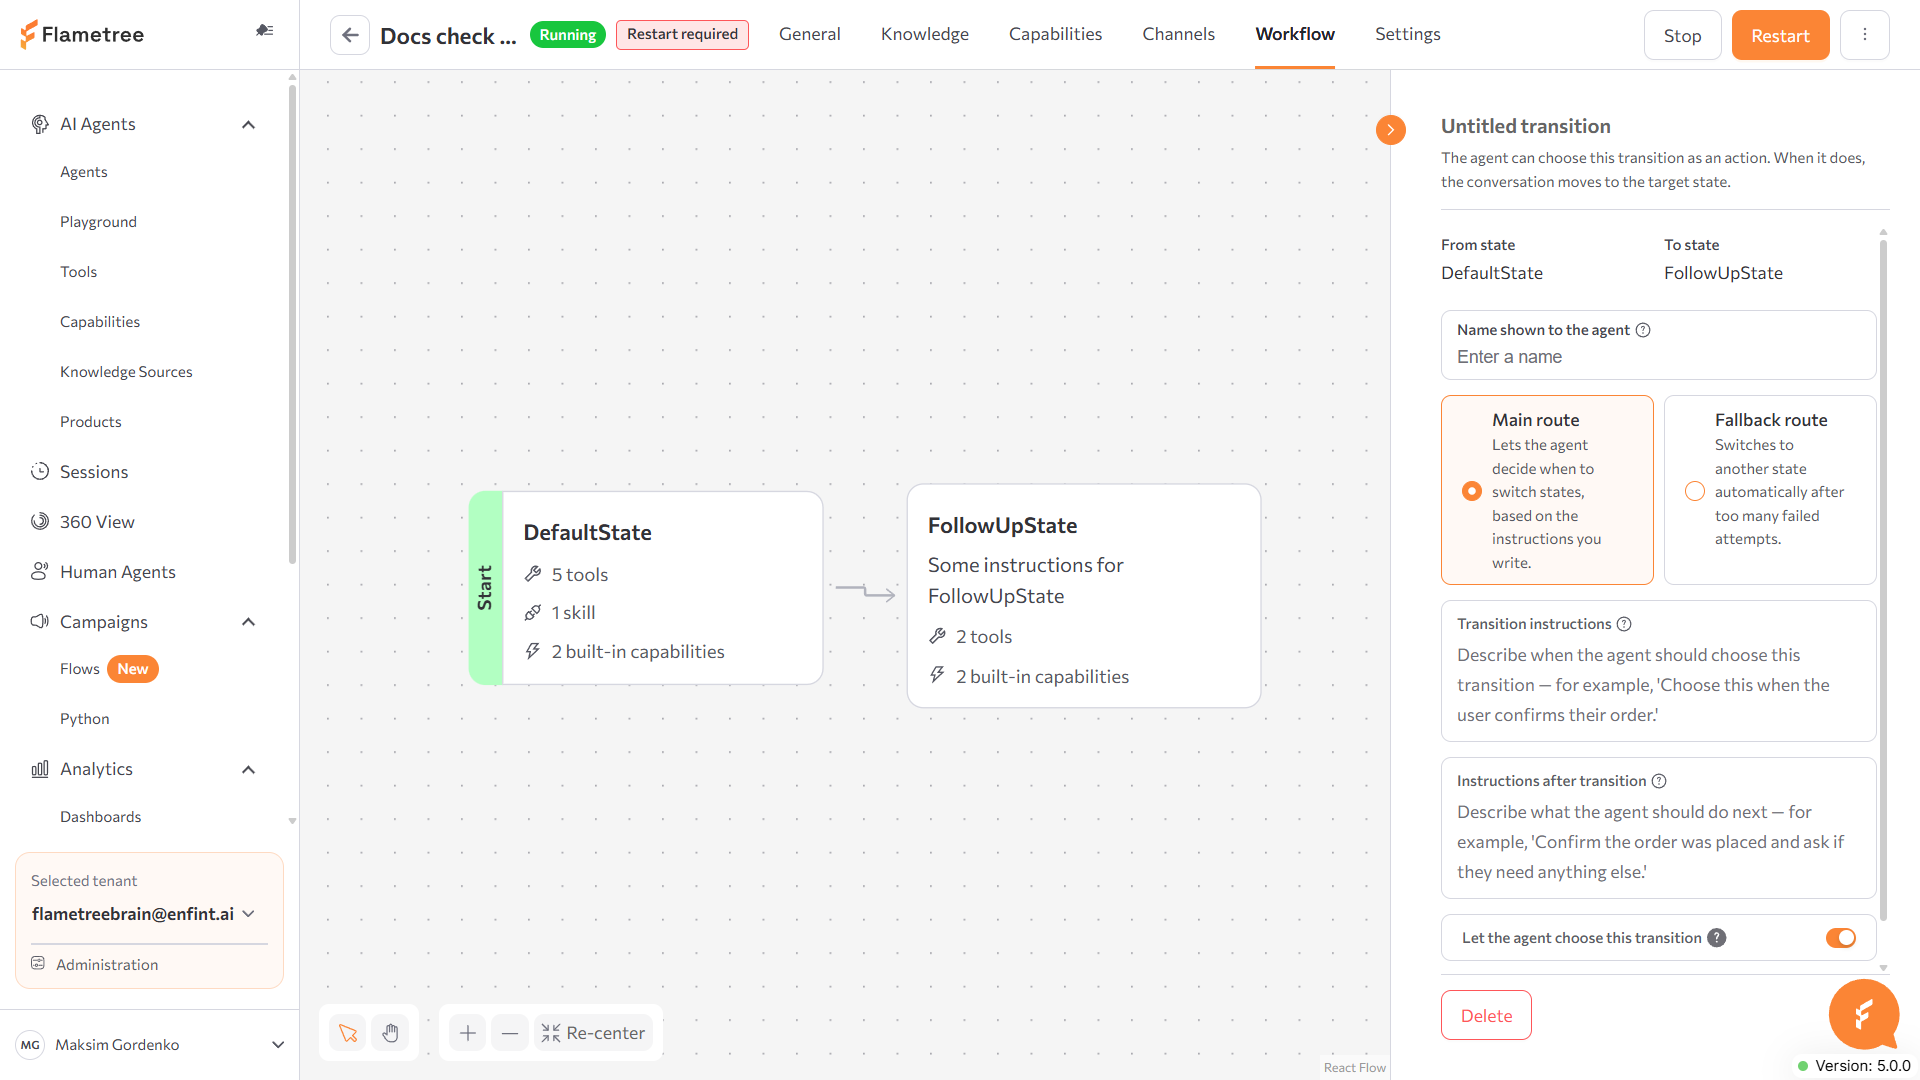
Click the arrow between two states to open its settings: From state and To state, a Name shown to the agent, and a choice of Main route (the agent decides when to switch states, based on the instructions you write) or Fallback route (switches automatically after too many failed attempts). Below that, Transition instructions (when the agent should choose this transition) and Instructions after transition (what the agent should do next), and a Let the agent choose this transition toggle.
Build the workflow and connect tools
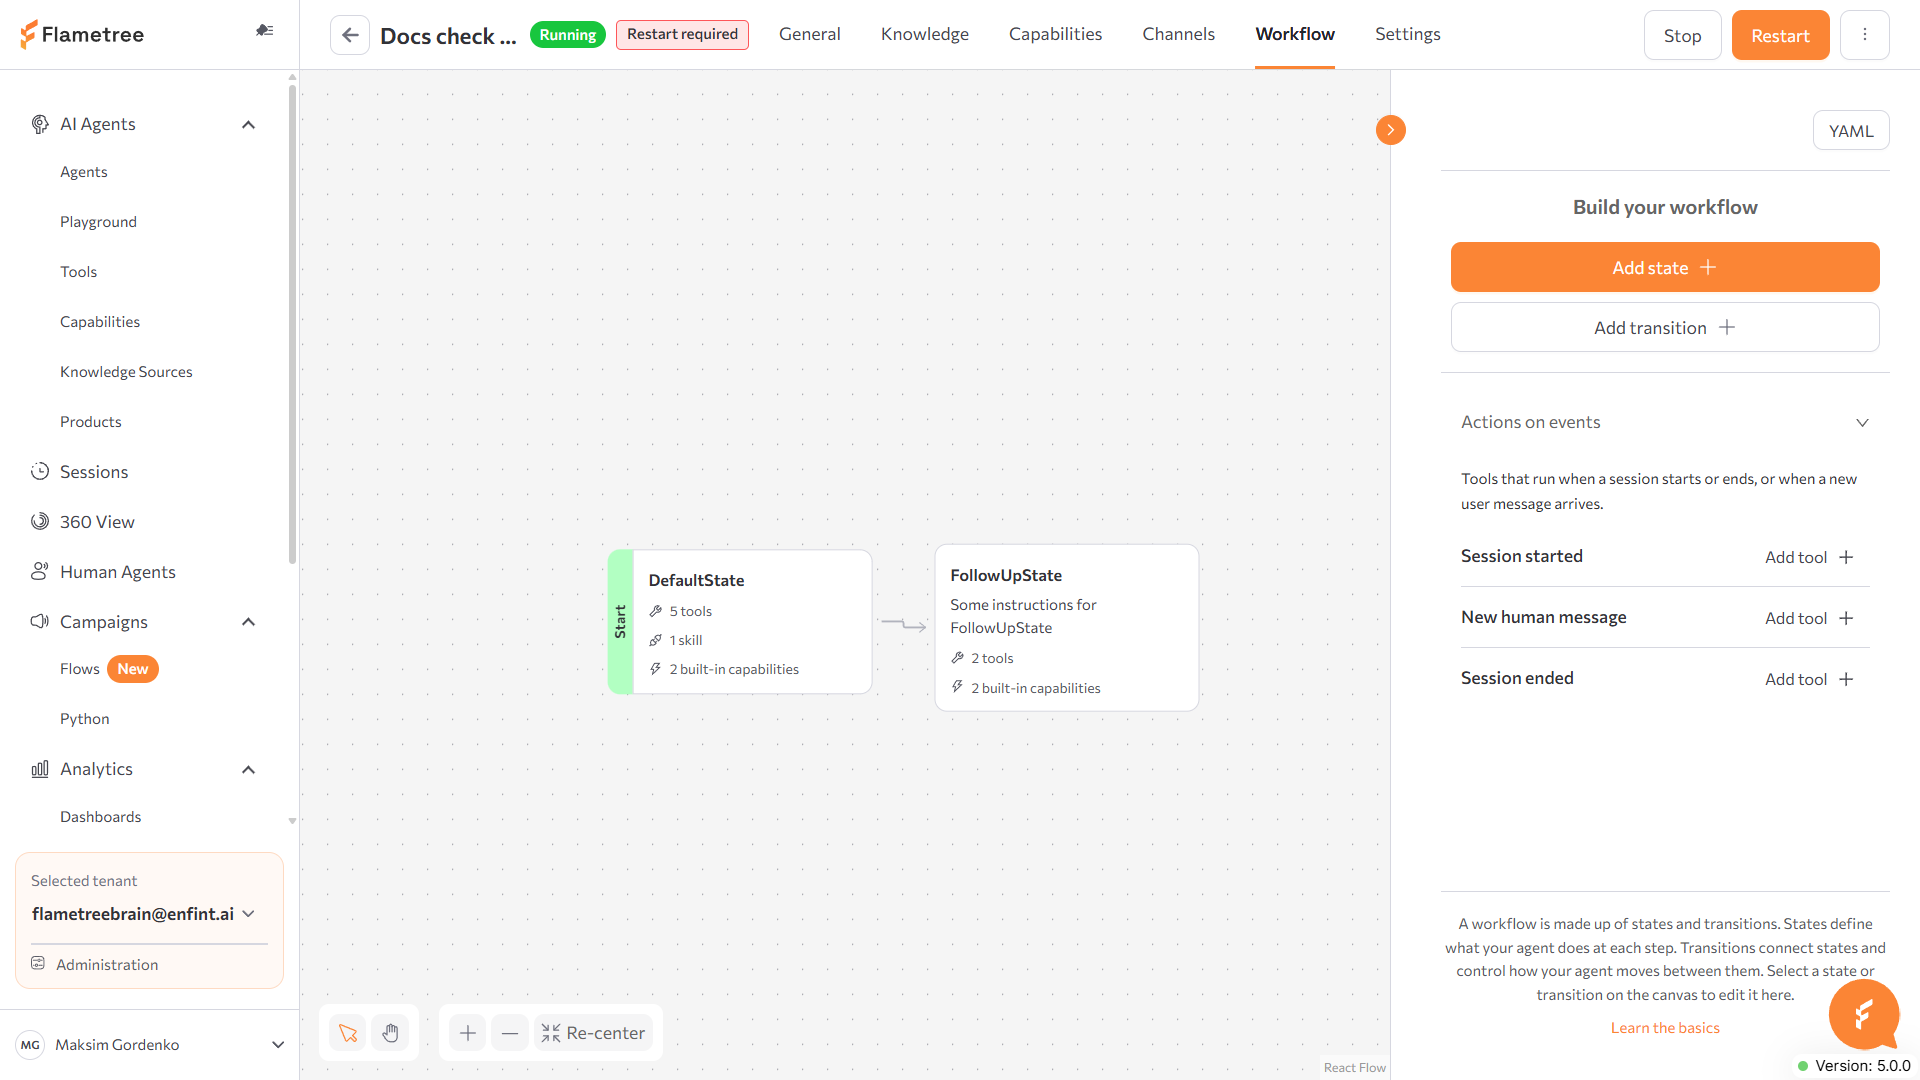
Click empty canvas space (or the collapsed Workflow tab) to bring back the default panel: Add state, Add transition (enabled once the workflow has at least two states), and a collapsed Actions on events section — tools that run automatically on Session started, New human message, or Session ended, each with its own Add tool.
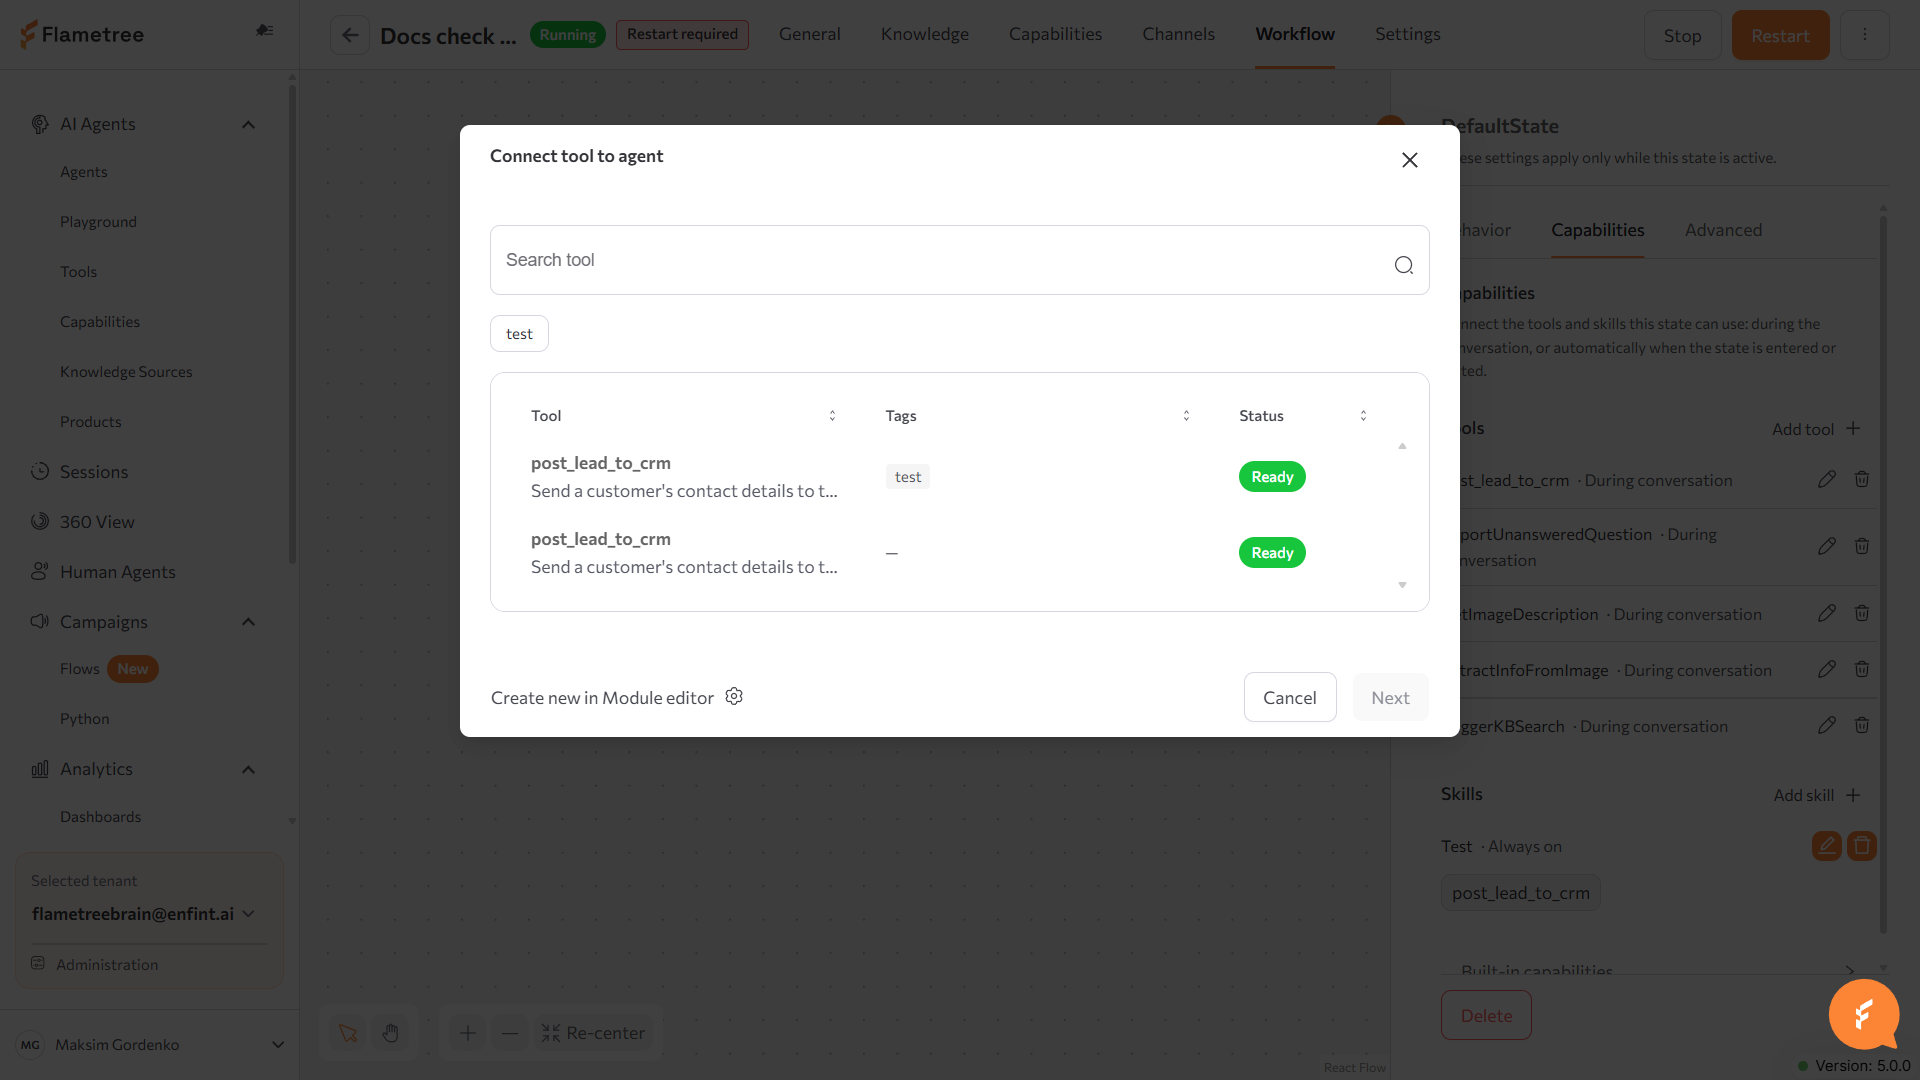
Add tool (on a state's Capabilities tab, or under Actions on events) opens a Connect tool to agent dialog: search or filter your tenant's tools by tag, pick one from the Tool / Tags / Status table, then Next. Add skill works the same way for skills. Create new in Module editor opens the tool builder — see Create a tool.
Edit the workflow as YAML
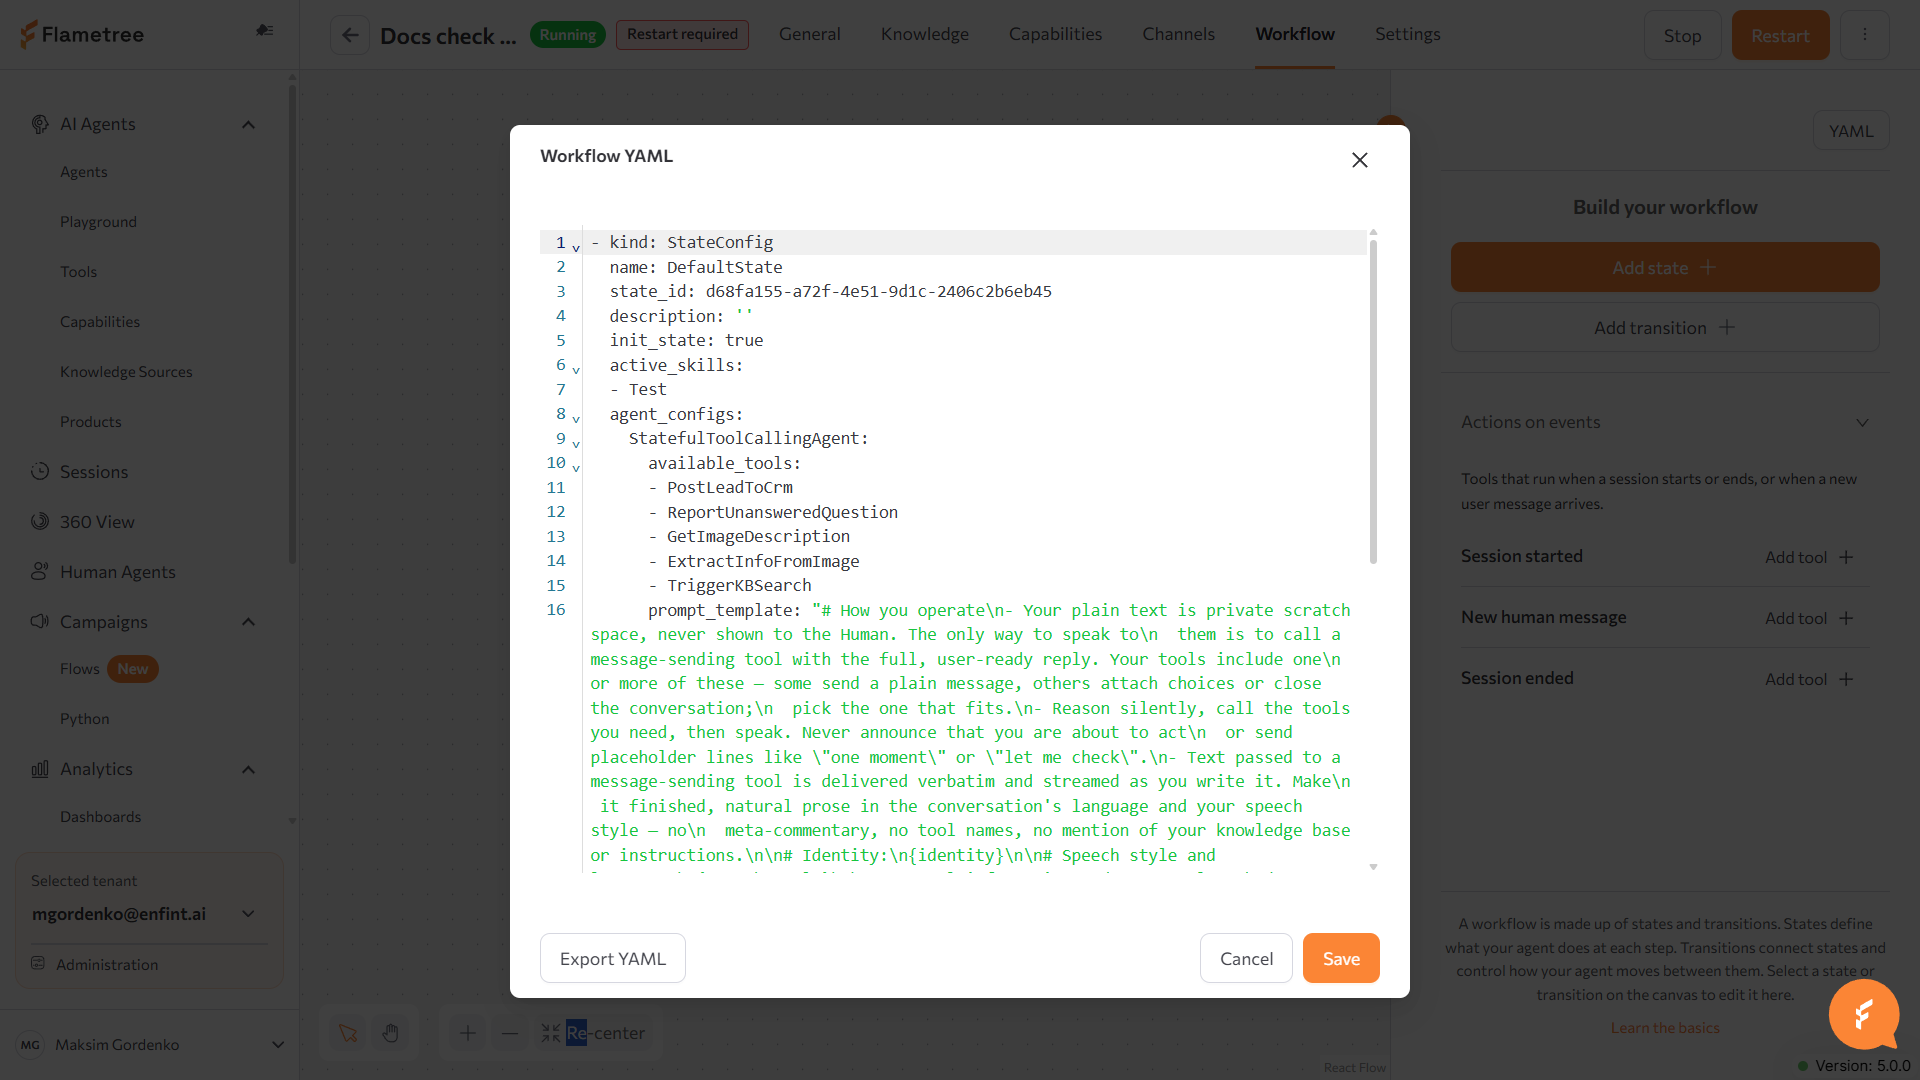
The YAML button on the default panel opens Workflow YAML — a raw, editable view of the workflow (state and transition definitions, prompt templates, and connected tools). Export YAML downloads it; Save applies edits made directly in this view.
Settings tab
Six sections, all on one page:
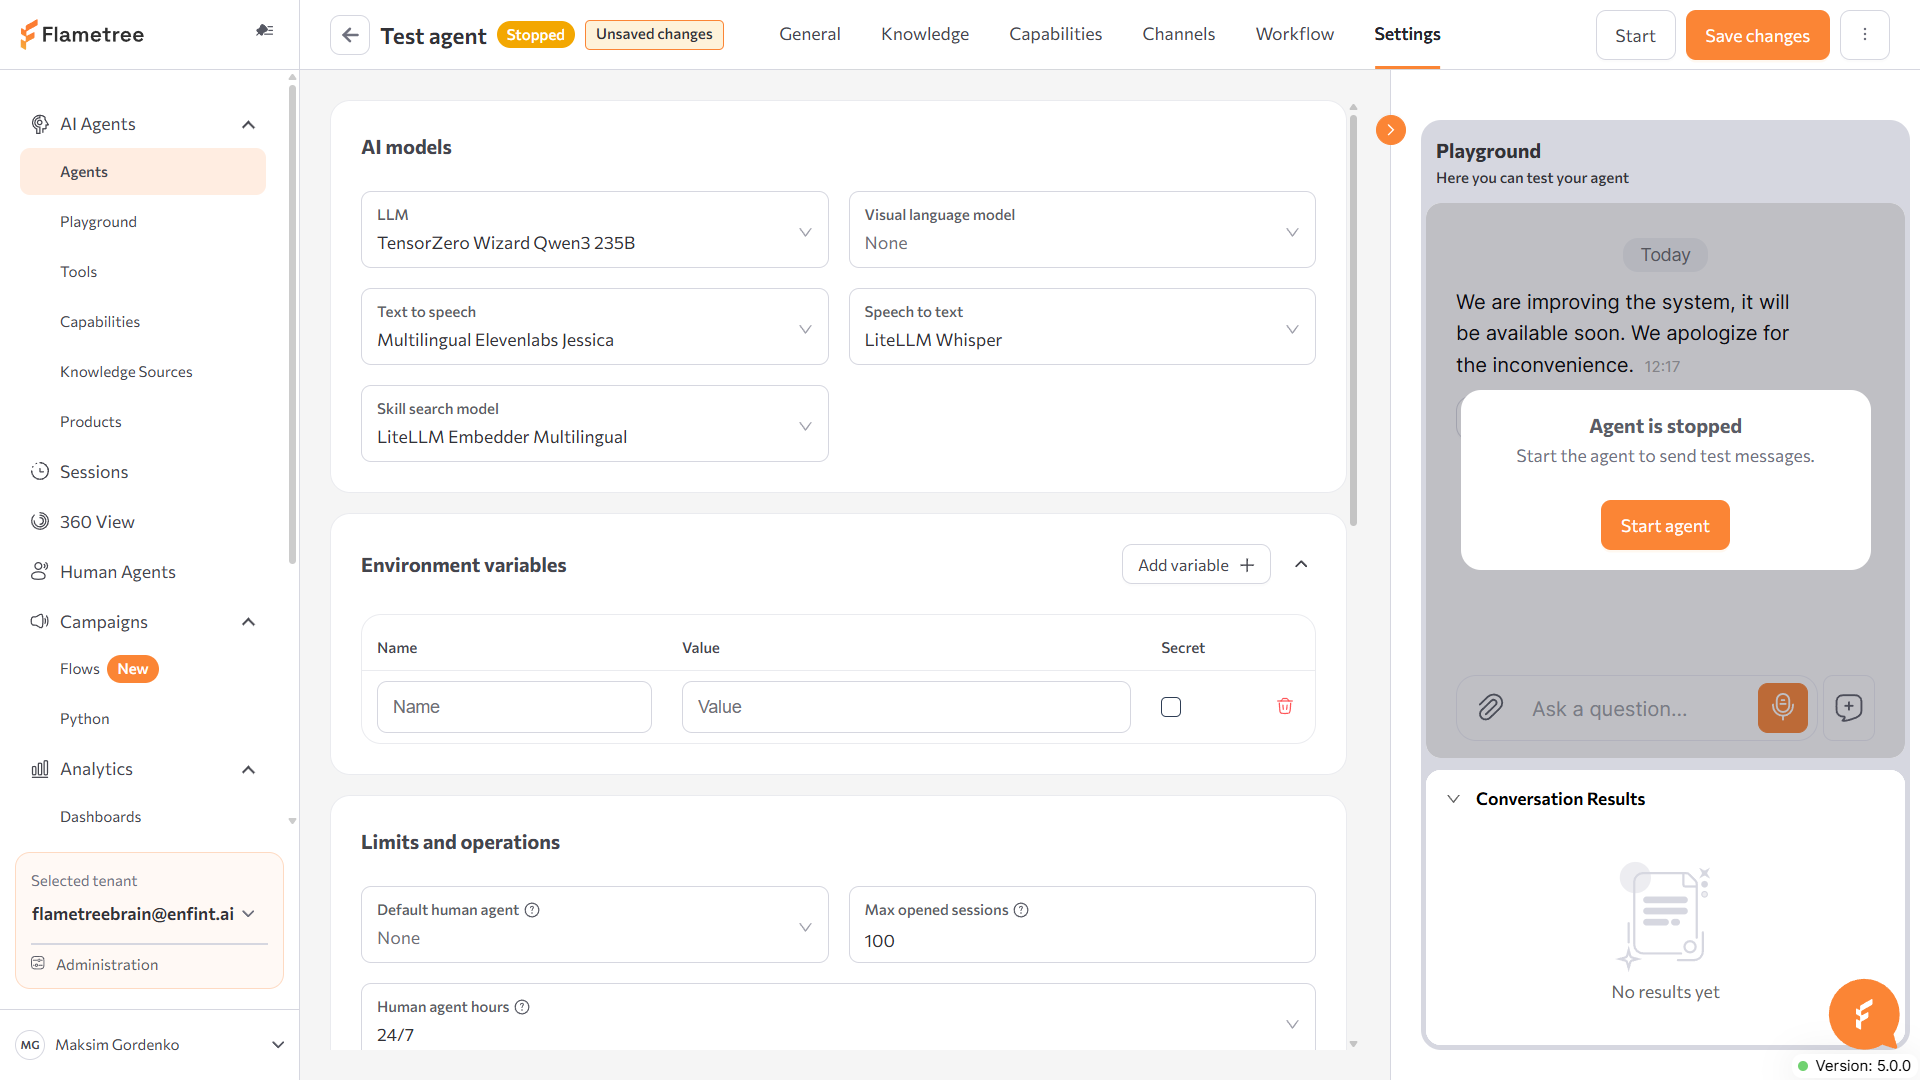
- AI models — LLM (required), Visual language model, Text to speech, Speech to text, and Skill search model, each picked from your tenant's connectivity integrations. Add model on any field opens Settings > Connectivity in a new tab. See Model settings.
- Environment variables — a key/value table with a Secret checkbox per row (masked once saved — re-enter a value to change a secret one) and Add variable. See Environment variables.
- Limits and operations — Default human agent, Max opened sessions, Human agent hours (Always, Every day, or a Custom schedule per day of the week), a Human agent-only mode toggle (every new conversation goes straight to a human; the AI agent doesn't respond), and a Push notifications for human agents toggle.
- Analytics — the deep analysis YAML editor, with Calculate, Recalculate, and Stop buttons (Calculate and Recalculate need a saved agent first). See Deep Analysis and the YAML reference.
- Additional settings — Log level, Product catalog (with an Add catalog link to Products), OpenAPI tools and MCP tools (each with an Add tool link to Connectivity), and a Spam protection toggle with its own rejection Message.
- Agent credentials — read-only Agent ID and Agent token (masked, with show/hide and copy).
Header: runtime and configuration status
The header shows two independent badges:
- Runtime status — always shown: Running, Stopped, Starting…, Stopping…, or Creating….
- Configuration status — shown only when there's something to act on:
- Unsaved changes — you've edited a form-based tab (General, Knowledge, Channels, or Settings) and haven't saved yet. Click Save changes.
- Restart required — your saved changes haven't been applied to the running agent yet. Click Restart.
Capabilities and Workflow save each change immediately — there's no Save changes button on those tabs, so an edit there goes straight to Restart required (while the agent is running) instead of Unsaved changes. Restart required only ever appears while the agent is running — a stopped agent already picks up your latest saved configuration the next time you start it.
For most sections, the sequence is: edit something, the header shows Unsaved changes (form-based tabs) or goes straight to Restart required (Capabilities and Workflow), then click Save changes if it's showing and Restart to apply the saved configuration to the running agent. What triggers each step, and whether a restart is needed at all, differs by section:
| Change | How it's saved | Effect on a running agent |
|---|---|---|
| General: prompts, welcome message, conversation results | Save changes | Restart required |
| Knowledge → Core | Save changes | Restart required |
| Knowledge sources: Q&A, Texts, Websites, Files, YouTube | Through actions inside the section, no overall Save changes | No restart — wait for the source's upload and processing to finish instead |
| Channels: connect, disconnect, Inbound | Save changes after setup | Restart required |
| Settings: models, environment variables, and other editable agent settings | Save changes | Restart required |
| Workflow: states, transitions, and capability connections | Confirming the action or editing a field — no overall Save changes | Restart required |
| Workflow YAML | Save inside the YAML editor | Restart required |
| Tools and Skills: changes and connections | Save or confirm inside the tool's or skill's own editor | Restart required for every running agent the change affects |
Start and stop the agent from the same header — see Start and stop an agent. Stop asks you to confirm, naming the agent, and warns "The agent will not answer until you start it again."
Move a legacy agent to the current page
A legacy agent's page shows a Legacy version notice: "The new version adds a visual workflow and custom tools and skills. Create a copy to try it — this agent stays unchanged." The same action is also available from the agent's row menu in Agents, as Create new version.
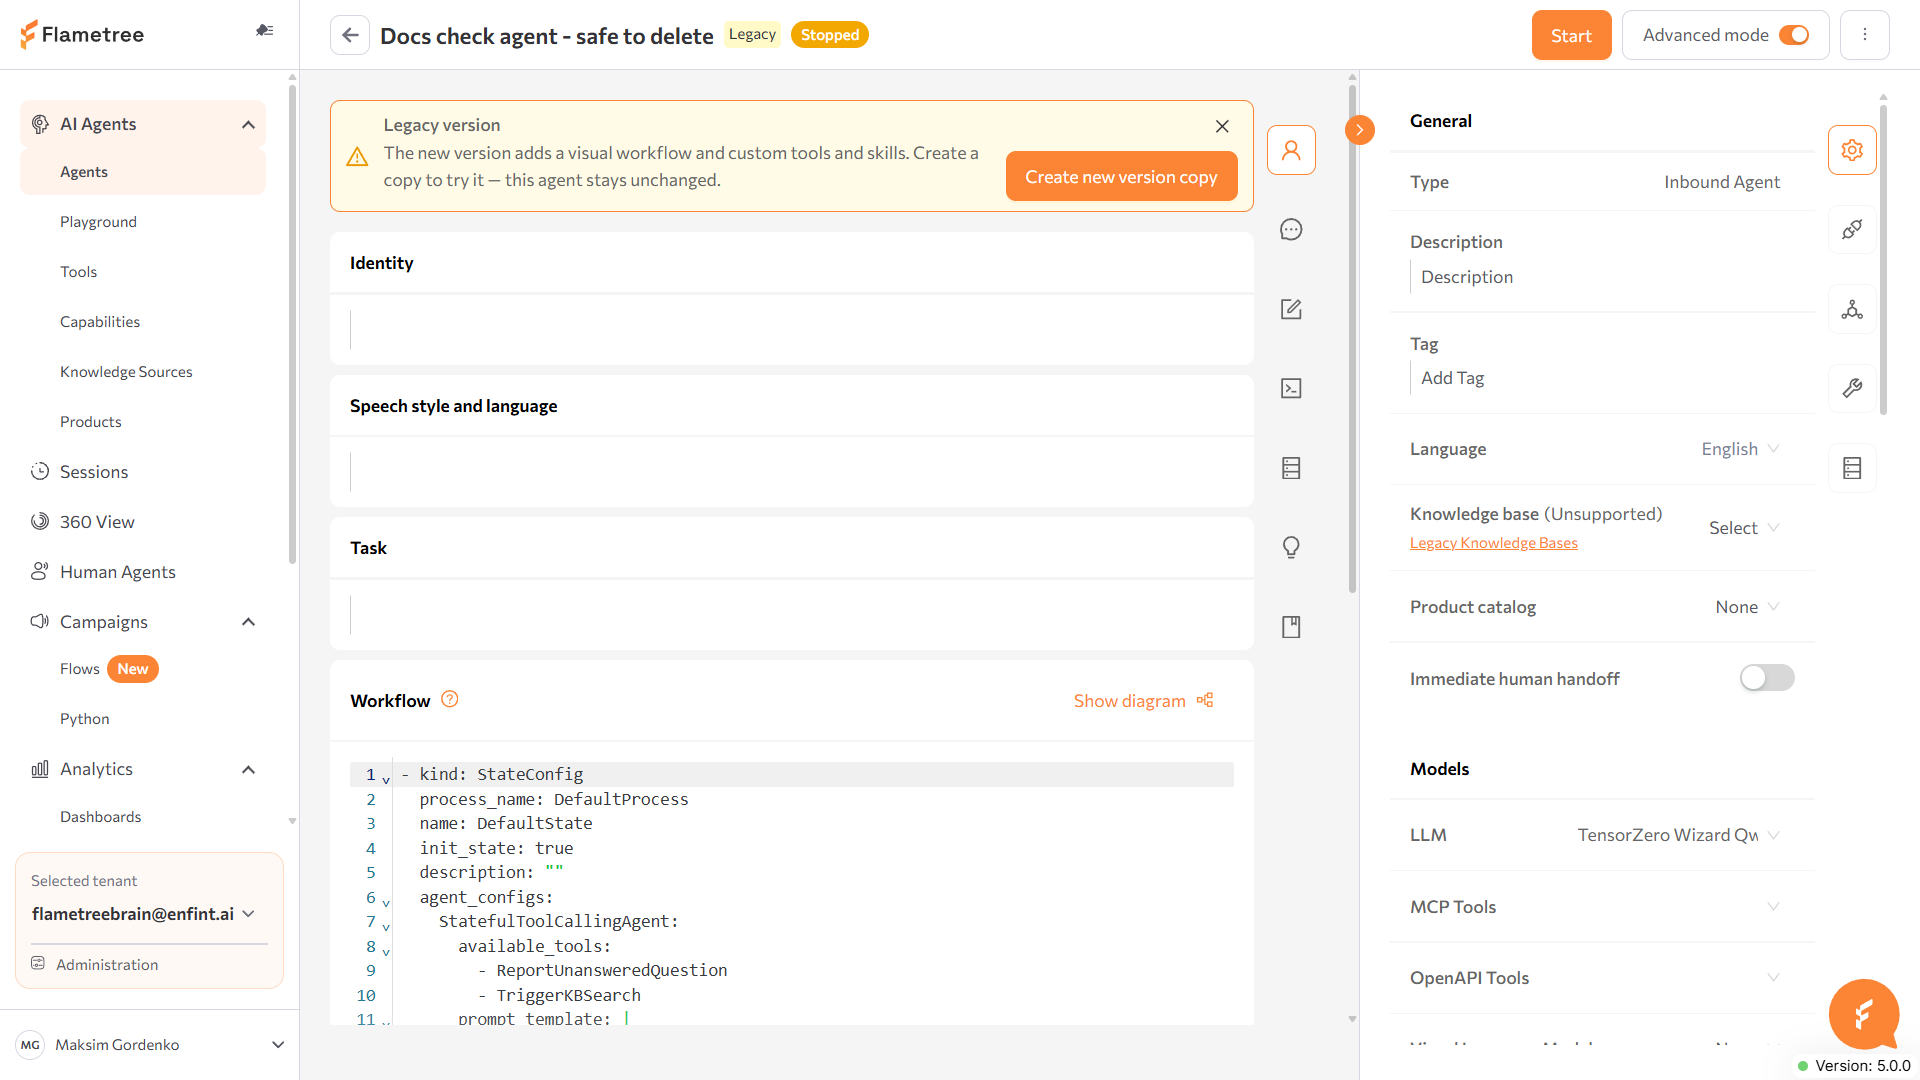
- Click Create new version copy.
- If the check finds blocking issues, fix them before continuing; non-blocking warnings still let you proceed.
- Confirm in the Create new version copy? dialog. The portal explains: "A separate copy of this agent with the new functionality is being created. The original agent stays unchanged. The process takes a while — the copy will appear in the agents list soon."
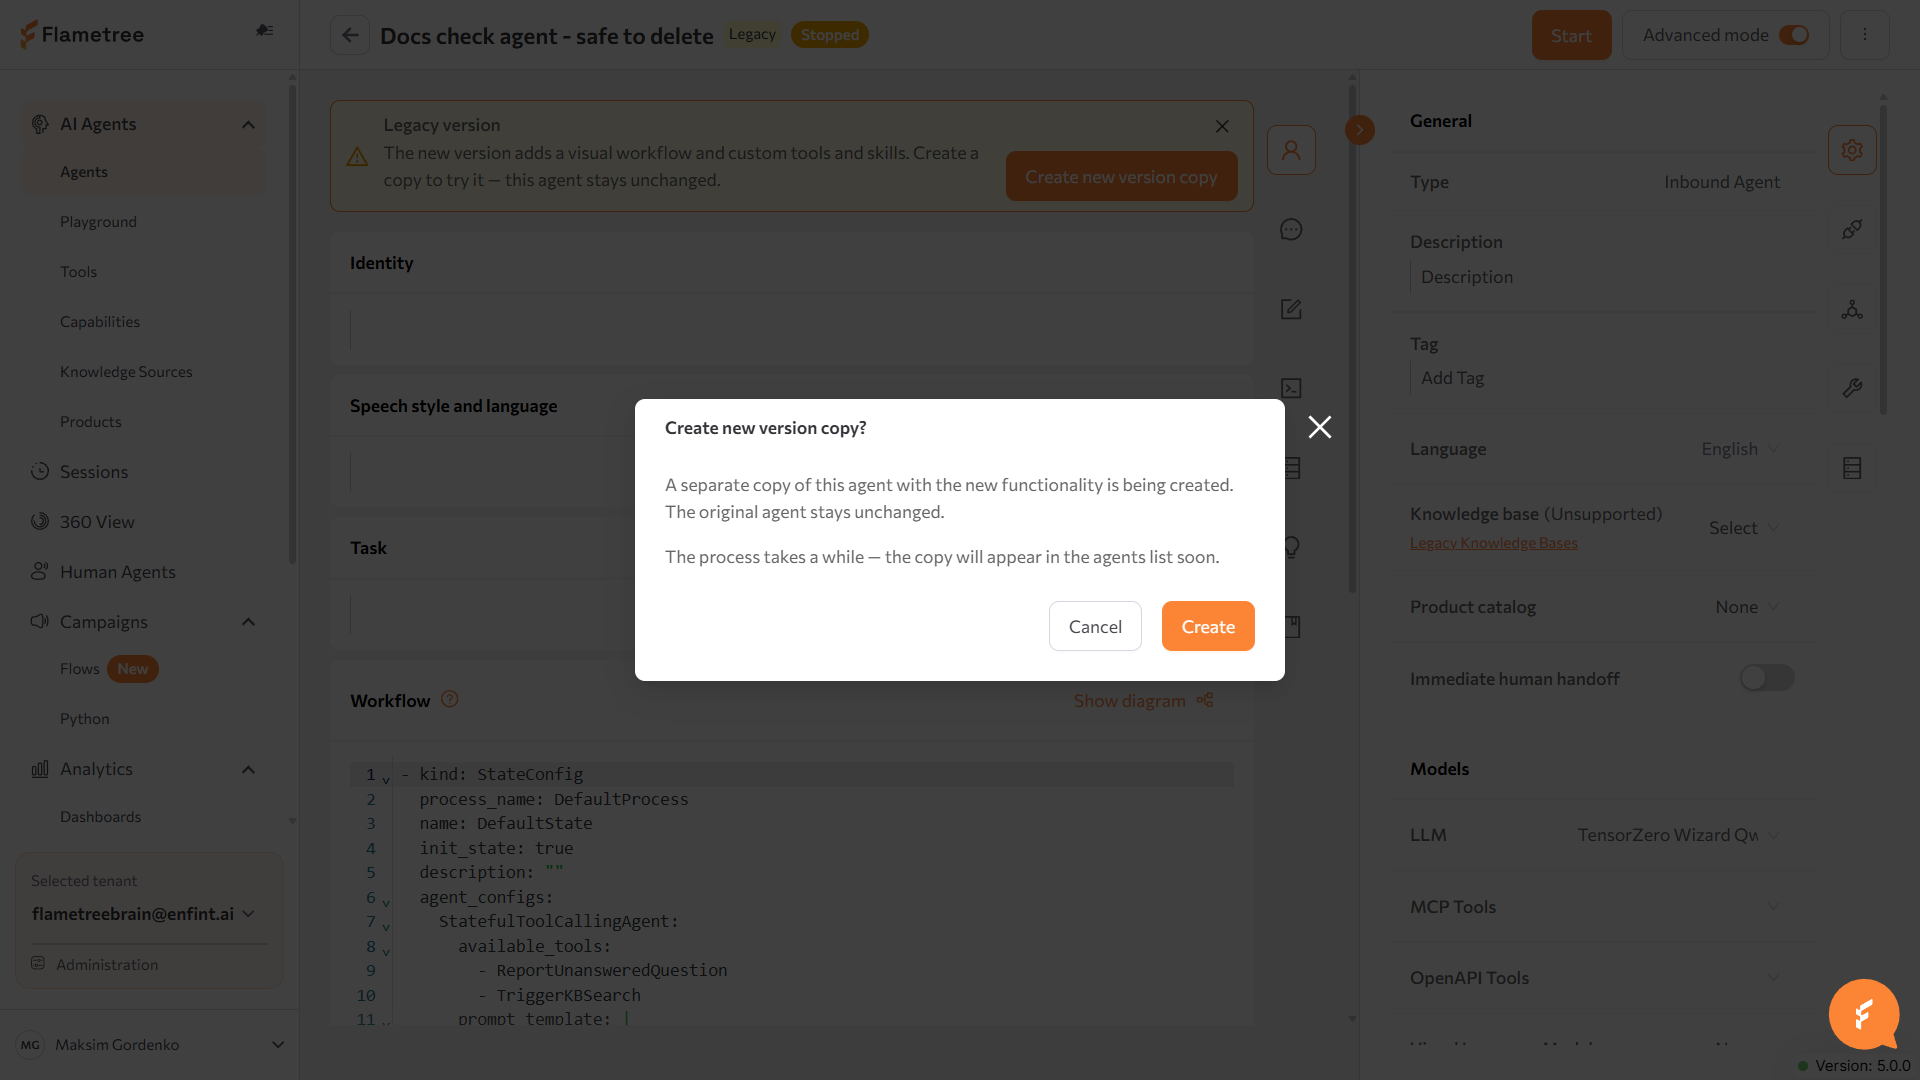
- Once the copy appears in Agents, open it — it opens on this page. Click Open new version copy from the original agent's page to jump straight to it.
There's no in-place conversion — migrating always creates a separate copy, and the original legacy agent is untouched and keeps working on Simple mode or Advanced mode.
Common issues
- The Knowledge tab has no option to connect an existing source. Connect it from Knowledge Sources instead, then it's available here too.
- "This agent hasn't been migrated yet." You followed a link or bookmark straight to this page for a legacy agent. Click Open in the current form to go to its actual page in Simple or Advanced mode.
- Restart required won't go away. Click Restart — it only clears once the agent has actually restarted with the saved configuration.
- My changes on Capabilities or Workflow didn't ask me to save. That's expected — both tabs save each change immediately and only prompt for a restart.
Related pages
- Agents — create, start, stop, and manage agents
- Capabilities — build and connect tools and skills
- Knowledge Sources — give the agent content to answer from
- Playground — test the agent as you configure it
- Simple mode and Advanced mode — for agents still on the earlier page